
Is it time for you to let your imagination run wild and plaster the walls in your home? Is it possible for a novice to successfully install plaster? Put away your search! In this detailed tutorial, we'll learn everything there is to know about plastering so that you can feel prepared to take on your plastering jobs. Explore the fundamentals, perfect the fundamental methods, and conquer the obstacles to becoming an expert plasterer.
Why is plastering important?
The cosmetic and aesthetic benefits of plastering go far beyond simply improving the home's appearance.
- The aesthetic value of a surface can be increased with the application of plaster since it creates a uniform, smooth, regular, and long-lasting finish.
- It hides that porous materials were used in the masonry construction and corrected any flaws in the drywall's original installation.
- Plastering is ideal for painting because it creates a smooth surface. Who among us wouldn't like their homes to have a clean, modern appearance?
- A surface free of fractures is a priority for us. Plastering reduces the likelihood of this happening.
- There will be less dust floating about after you plaster.
Important Equipment for Wall Plastering
Gauging Trowel
A gauging trowel is a crucial tool when estimating how much plaster you'll need. This trowel can spread cement mortar along mouldings and into corners. The end of the instrument could be rounded or pointed.
Bucket Trowel
Working with a large bucket of plaster might be messy, but bucket trowels with slanted handles make the job much easier. The ample ledges make it easy to scoop the substance. These trowel buckets can also be used to mash up the plaster.
Window Trowel
Around windows, you'll need a window trowel. This trowel is ideal for working in confined locations due to its narrow blade face. In place of larger trowels, you can use a window trowel instead.
Spackle Knife
When you're plastering, a little knife is a crucial tool. Before using this equipment, ensure the knife can be run on fissures and uneven surfaces. To repair damaged plaster or even it out, use a spackle knife.
Utility Knife
In addition to being useful for opening bags of plaster, a utility knife is a high-quality instrument with many other applications. You can also use the knife to make precise cuts in drywall sheets for repairs. Plastering jobs frequently call for the usage of a decent utility knife.
Spirit Level
A spirit level is another must-have item for plasterers. A smooth surface can be achieved with the help of this equipment. The accuracy of your plastering can be increased by using a water tube attached to a spirit level to determine the surface level.
Sponge

A sponge is another important tool for finishing a plaster job. In the toolkit of any good plasterer is a square moist sponge. In place of a sponge, invest in a water brush.
Float
Floats are used to apply and smooth mortar onto a wall. The flat surface of a metal or wooden board features a convenient grip. Floats can be purchased in a plastic or a rubber variety, depending on your preference.
The metal float, a laying trowel, is made of thin sheets of tempered steel. Use it to trowel the plaster and get a professional result. The last coat of plaster is applied with a wooden float, sometimes known as a skimming float.
Straight Edge
A straight edge can make uneven areas on a rendered floor uniform. A straight-edge tool can be useful for efficiently levelling off a big area of plaster or concrete. Aluminum is the material of choice for most straight edges because of its lightweight and resistance to corrosion.
Hawk
A plastic hawk is a handy tool for transporting wet plaster thanks to its smooth surface and handle. It is possible to load the mucky mixture onto the trowel. Cleaning and plastering a hawk is a piece of cake. However, newcomers may need help to keep up with the pace.
Hammer
Even inexperienced plasterers can complete a job successfully with the help of a well-designed hammer. The most popular types of hammers are drywall hammers and claw hammers. You can use either to chip away at the plaster and reveal the underlying surface. Drywall hammers are easily recognized by their distinctive hatchet-shaped heads, whose surfaces are slightly bent to manage high places.
Paddle Mixer
A paddle mixer is one of the most important items for standard plastering. You may quickly and easily mix many buckets of plaster by clamping a paddle mixer onto the drill chucks. Because of their unique construction, these instruments can be used with dry plaster and other materials. Invest in a paddle mixer if you want to adjust your plaster's consistency and eliminate clumps as you work.
Threads
Threads are tools for gauging the thickness of various types of plaster during building.
Plumb Bob
The plumb bob is used to measure and verify vertical wall levels. The bob of the level gauge is formed like a sturdy cone. One end is sharp, while the other is threaded.
Automatic Taping Tool
A taping tool is helpful when applying joint tape and taping compound to flat joints. When using an automatic taping tool, you can be confident that you have selected the appropriate amount of compound. Using an automated taping tool also helps cut down on waste and sanding.
Since autonomous tools have extended reach, there's no need to risk injury by climbing a ladder to reach upper shelves or ceilings. Even while cutting-edge automatic taping equipment may have a hefty upfront price, it will be well worth it in the long run.
Types of plaster
The nature of your construction will determine whether you employ interior or exterior plaster. Here are the key distinctions between the two plaster types, whether you buy ready-mixed or mix it yourself.
Tough Coat Plaster
Most commonly used for masonry walls and backdrops, fireproof hard undercoat plaster also has high impact resistance. Tough coat plaster is so resilient that it can even withstand freezing walls.
Browning Plaster
Used mostly as a painting medium. Although browning plaster functions similarly to bonding plaster, it is better suited for usage on absorbent surfaces. When applied to walls and ceilings, browning plaster is typically 11mm thick and takes at least a day to dry.
One Coat Plaster
Think of it as two coats in one. Because of the gypsum content, one-coat plaster is simple to apply and has a thicker consistency. One-coat plaster is a time-saver that can be easily modified in smaller spaces.
Bonding Plaster
Bonding plaster's adhesive characteristics make it a common choice as an undercoat in construction. Like browning plaster, bonding plaster is often put at 11mm for walls and 8mm for ceilings. It is efficient for all degrees of absorption and can be applied on any surface.
Dri-Coat Plaster
Used mostly for re-plastering following a damp proof course (DPC). It works especially well to stop the flow of hygroscopic salts, which can cause damp walls when the salts absorb moisture from the air. While dri-coat plaster can prevent damage to walls, it should be kept out of direct sunlight and away from freezing temperatures.
Thistle Plaster
Finish coat applied after the plastering procedure has been completed. This type of plaster is widely used for practice skimming plasterboard and for little repair jobs due to its ease of use and adaptability. Thistle plaster is of the highest quality and always leaves a flawless finish.
Hardwall Plaster
Ideal as an undercoat plaster for medium-density masonry surfaces like blocks and bricks. Hardwall plaster, like other undercoats, is simple to apply and can be used to make a textured plaster wall finish. However, care must be taken while working on more robust surfaces, such as old, disintegrating walls, which could lead to plaster cracking.
Carlite Plaster
Carlite plaster, when applied over another material, is a flexible option that may be used with many different backgrounds. Carlite plaster takes around three hours to set, while thistle plaster only needs two hours. Carlite can withstand rough treatment and has a long lifespan.
This Step-by-Step Guide Will Plaster Your Walls
Prepare The Wall For Use
Make sure there is no debris in the area to be plastered. Get rid of any dirt, dust, old paint, and obstructions. Remove any leftover dust or dirt by washing the area or brushing it.
Protective sheets or old blankets can cover larger items or furniture that cannot be moved.
Put On Some Primer
Priming is necessary to improve plaster adhesion and surface suction. Priming requires a mixture of PVA glue and water at a 4:1 ratio, with four parts water to 1 part glue. A typical priming job requires two coats: one to function as a barrier between the surface and the plaster and another to glue the plaster to the surface.
Combined The Plaster
Plaster powder should be added to water gradually to prevent lumps from forming at the bottom of the mixing bucket. It would help if you prepared the mixture according to the manufacturer's recommendations to get the right feel and consistency.
It's Time To Start Plastering Now
The plastering itself is the most time-consuming element of the process. Patience is a virtue that is needed for this work. Experts recommend that Plaster be applied to a surface from the top down. Plastering a wall is easiest for right-handers if they begin at the top left, and vice versa for left-handers.
Get your trowel and hawk wet with fresh water to begin. If you don't want the plaster to fall off your trowel and onto the floor, load up your hawk with a small quantity of plaster and spread it around your tool before you begin. Then, scoop out a glob of plaster using the bucket trowel and place it in the hawk's eye.
Hold the hawk in your left hand and the trowel in your right; if you're left-handed, switch the positions. Use a trowel and a hawk with a small inward tilt to cut through the plaster from the top and exit the rear. It would help if you increased the tilt inwards to prevent it from falling flat on the floor as you push through.
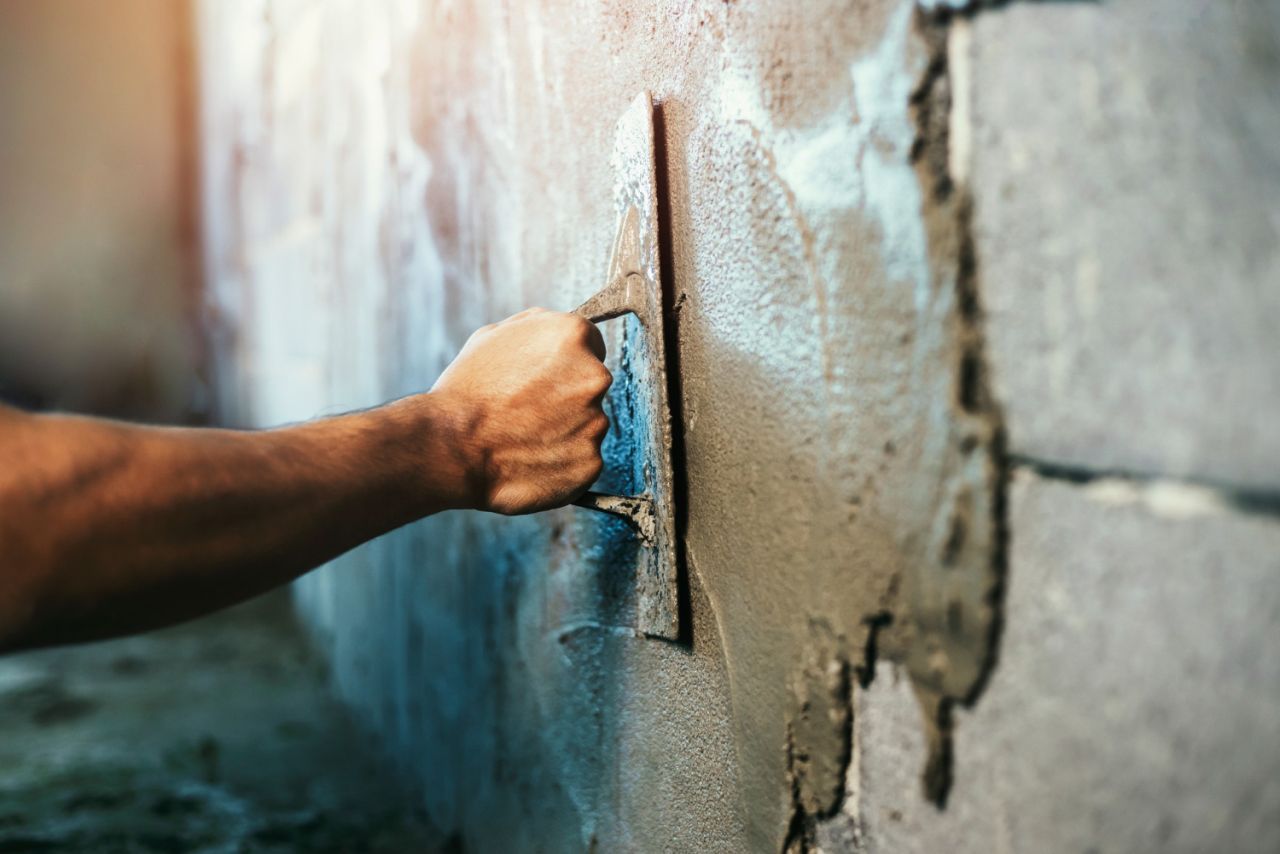
The plaster should be applied by holding the trowel at an angle of 15° to 20° to the wall and gliding steadily across the surface. Keep going until it's nearly flat, and press evenly. Don't give up if things aren't ideal; that time will arrive. Carry on doing this until the entire wall is covered.
It's Now Ready For A Second Layer
The second coat should be applied after the first has dried and turned tacky. The second coat should be mixed the same way as the first, but less paint will be required because the first coat serves as a base. The second layer should go on more easily and fill gaps or flaws. Close up any cracks and make everything even.
The flat plaster could also be smoothed with clean water. Apply along the wall using a wet brush, then trowel across in a smooth, equal motion. If water seeps in, dig it out using a trowel. Make sure any flaws are patched up.
Put In The Finishing Troweling
Finish up the wall by giving it another troweling. After wiping the trowel clean with a damp rag, you can trowel out the wall again, but be careful not to overwork it. At this point, nothing out of the ordinary should be happening.
Decorate And Paint
When the wall has dried completely, you can sand it to eliminate imperfections. Remove any lingering residue, and it's done! Now is the time to begin wall decoration.
Plastering is not optional for making and constructing beautiful, long-lasting homes.
Conclusion
Plaster installation is a crucial aspect of home improvement, providing a uniform, smooth, and long-lasting finish. It not only improves the appearance of a home but also creates a clean, modern appearance. Plastering is ideal for painting because it creates a smooth surface, hides porous materials, and corrects flaws in drywall's original installation. It is ideal for painting because it reduces the likelihood of fractures and less dust floating about after plastering.
Important equipment for wall plastering includes a gauging trowel, bucket trowel, window trowel, spackle knife, utility knife, spirit level, sponge, float, straight edge, hawk, hammer, paddle mixer, threads, plumb bob, and automatic taping tool. These tools help adjust the consistency of plaster and eliminate clumps as you work.
There are several types of plaster, including tough coat plaster, browning plaster, one coat plaster, bonding plaster, dri-coat plaster, and thistle plaster. Tough coat plaster is commonly used for masonry walls and backdrops, while browning plaster is used for painting mediums.
One coat plaster is simple to apply and has a thicker consistency, while bonding plaster is an adhesive choice for all degrees of absorption.
Dri-coat plaster is used for re-plastering following a damp proof course (DPC) and prevents damage to walls. Thistle plaster is a finish coat applied after the plastering procedure has been completed, making it popular for practice skimming plasterboard and small repair jobs.
In conclusion, plastering is a crucial aspect of home improvement, providing a smooth, long-lasting finish, and enhancing the overall appearance of a home. Investing in the right equipment, such as a gauging trowel, bucket trowel, window trowel, spackle knife, utility knife, spirit level, sponge, float, hammer, threads, plumb bob, and automatic taping tool, can help you achieve your dream plastering job.
Thistle plaster is a high-quality, flawless finish, while Hardwall plaster is ideal for medium-density masonry surfaces like blocks and bricks. Carlite plaster is a flexible option that can be used with various backgrounds and takes around three hours to set. To plaster walls, prepare the area with no debris, remove any dirt, dust, old paint, and obstructions, and cover larger items or furniture with protective sheets or blankets.
Put on some primer, a mixture of PVA glue and water at a 4:1 ratio, and combine the plaster. Start plastering by holding the trowel and hawk wet with fresh water, gliding the plaster across the surface until it's nearly flat and pressing evenly.
Apply a second layer of plaster after the first has dried and turned tacky, mixing the same way as the first but with less paint. Smooth the flat plaster with clean water and trowel across in a smooth, equal motion.
Finish the wall by giving it another troweling, wiping the trowel clean with a damp rag. When the wall has dried completely, sand it to eliminate imperfections and remove any lingering residue. Plastering is essential for creating beautiful, long-lasting homes.
Content Summary
- Can beginners successfully install plaster? Find out in this tutorial!
- Learn the fundamentals of plastering in this detailed guide.
- Discover the aesthetic benefits of plastering for your home.
- Achieve a uniform, smooth, and long-lasting finish with plaster.
- Hide porous materials and correct flaws in drywall installations with plaster.
- Plastering creates a clean and modern appearance for your home.
- Reduce the likelihood of fractures with proper plastering techniques.
- Less dust floating around after plastering - a cleaner job!
- Learn about essential equipment for wall plastering.
- Gauging trowel: An important tool to estimate plaster quantity.
- Bucket trowel: Make plastering jobs easier with this tool.
- Window trowel: Ideal for working in confined spaces.
- Spackle knife: A crucial tool for plastering and repairing damaged areas.
- Utility knife: Useful for opening bags and making precise cuts.
- Spirit level: Achieve a smooth surface with this tool.
- Sponge: Essential for finishing a plaster job.
- Floats: Apply and smooth mortar onto walls with ease.
- Straight edge: Efficiently level off large areas of plaster or concrete.
- Hawk: A handy tool for transporting wet plaster.
- Hammer: Helpful for chipping away at plaster and revealing surfaces.
- Paddle mixer: Easily mix plaster and adjust consistency.
- Threads: Tools for gauging plaster thickness during construction.
- Plumb bob: Measure and verify vertical wall levels accurately.
- Automatic taping tool: A time-saving device for joint taping.
- Explore the different types of plaster for your construction needs.
- Tough Coat Plaster: Fireproof and highly impact-resistant.
- Browning Plaster: Ideal for absorbent surfaces.
- One Coat Plaster: A time-saving option for smaller spaces.
- Bonding Plaster: Adhesive characteristics for undercoat applications.
- Dri-Coat Plaster: Great for re-plastering after a damp proof course.
- Thistle Plaster: A high-quality finish coat for skimming plasterboard.
- Hardwall Plaster: Perfect for medium-density masonry surfaces.
- Carlite Plaster: Flexible and long-lasting option for various backgrounds.
- A step-by-step guide to plastering your walls.
- Prepare the wall for plastering by removing debris and obstructions.
- Priming is crucial for improving plaster adhesion and surface suction.
- Learn the proper way to mix plaster for the right consistency.
- Start plastering from the top down for the best results.
- Use the right tools, like the trowel and hawk, to apply plaster smoothly.
- Apply a second coat after the first has dried to fill gaps and flaws.
- Finishing troweling gives the wall a smooth and even surface.
- Sand the wall to eliminate imperfections before decorating and painting.
- Achieve beautiful, long-lasting homes with plastering.
- Explore the importance of plastering for cosmetic and aesthetic benefits.
- Differentiate between interior and exterior plaster and their uses.
- Tough Coat Plaster: Versatile and resilient for masonry walls.
- Browning Plaster: Suitable for painting and absorbent surfaces.
- One Coat Plaster: A time-saving option with a thicker consistency.
- Bonding Plaster: Adhesive undercoat for various surfaces.
- Dri-Coat Plaster: Used for re-plastering after damp proofing.
Frequently Asked Questions About Plaster Installation
The drying time of plaster depends on various factors, such as humidity, the thickness of the plaster layer, and ventilation. Generally, it can take 24 to 48 hours to dry completely.
Beginners should wear protective goggles, gloves, and a mask to protect themselves from dust and chemicals. Adequate ventilation is also essential.
Beginners should avoid applying too much plaster at once, neglecting to smooth out the surface, or failing to clean tools properly, as these can result in an uneven finish.
Beginners can achieve a smooth finish by applying plaster in thin, even layers and using a trowel to spread and level the plaster. Sanding the surface lightly after drying can further enhance smoothness.
If beginners feel unsure or lack confidence in their abilities, they should seek professional help for a flawless plaster installation. Professional plasterers have the expertise and experience to deliver high-quality results.


