
Many homeowners value the one-of-a-kind allure and personality that plaster walls bring to their homes. On the other hand, they might need help to work with when it comes to hanging things that are heavy. You have found the proper place if you are interested in learning how to hang heavy things on plaster walls without causing damage to the walls themselves.
The fact that plaster walls are more fragile than other types of walls, such as drywall or concrete, presents the greatest obstacle while working with these walls.
This results in a more limited selection of hardware options due to the fact that not all of them are compatible with plaster.
If you continue to do so, the plaster will eventually fracture.
When dealing with plaster walls, you will need to make choices that put the preservation of the plaster wall in the highest regard.
In this in-depth tutorial, we will take you by the hand and lead you through the process step by step, arming you with the information and the self-assurance you need to hang your cherished belongings effectively.
What Are Plaster Walls?
Plaster walls are an older form of wall that were common in use during the 1800s and the early 1900s. Every wall constructed with plaster is comprised of three distinct layers: the stud layer, the plaster layer, and the lath layer.
Plaster adheres to the lath layer, which is nailed to the stud layer to secure the wall.
Plaster was the material of choice for interior walls until the 1940s. In order to construct a strong and sturdy wall, individual pieces of wood, known as a lath, were stacked one on top of the other in a layered fashion.
Wall studs are wooden frames that are used to provide support for lathing.
The wooden lath and studs are held together with the assistance of nails. Plaster is applied in multiple layers on top of a wall in order to give it a great finish and create a finished product.Plaster walls, in a nutshell, are constructed of lath that is fastened to wall studs and then covered in plaster. Drywall panels gradually replaced drywall as the material of choice in modern home construction.
This was mostly attributable to the fact that they are less fragile and need less effort to install.
On the other hand, plaster walls are seeing a renaissance in certain quarters.
Types of Walls
Plaster and masonry are the two primary categories of walls, and each category requires a distinct set of fasteners. Plaster walls on the inside of a building are constructed with sheets of plasterboard that are fastened to a timber frame.
This construction method leaves a cavity behind the plasterboard.
The horizontal pieces of the timber frame are called rafters, and the vertical parts of the studs are the best places to hang things.
Bricks or blocks are typically used to construct masonry walls.
They may keep the bricks in their natural state or cover them with cement render, which results in a flawless surface.
Picture Rail
In the event that you are one of the lucky few, you probably have picture rail installed in at least some of the rooms in your house.
Do not think that the small piece of molding that is located at the very top of your wall is a miniature version of the crown molding there.
It serves a good goal, which is to safeguard the walls in your home and make your life easier overall.
Picture rail was put up so that you would have a place to hang items such as mirrors, artwork, photos, and anything else you might want to use to decorate your walls without drilling holes in the plaster.
The operation is as follows:
In order to provide the picture rail with more holding strength, it was fastened to the studs, which were located towards the top of the wall, after installation. The height can vary widely based on regional customs and the preferences of the builder, but it is common to have picture rail anywhere from half an inch to one foot below the ceiling. Small hooks that were able to latch into the picture rail were used to suspend the pictures from longer wires or cords that were adjusted to the desired height by the homeowner. Because of this, the pictures were able to be moved to the left or right of any location within the room with ease, and the height of the photographs could be adjusted by simply adjusting the length of the picture wire. Picture rail is an excellent option for the majority of decorative purposes; nevertheless, it is not recommended for hanging particularly heavy objects. It's only a piece of wood molding when all is said and done.
If you believe that anything might be too heavy, the ideal solution is to place it on the wall in a more stable manner.
Some ancient plaster walls have a thin strip of wood that runs around the perimeter of a room, often between 1 inch (2.5 cm) and 1 foot (30 cm) below the line of the ceiling. This wood strip can be found in rooms with ceilings that are between 8 feet (2.4 m) and 12 feet (3.7 m) high.
In the event that your room has this, all you need to do to hang things from it is drill a hole through the wood and insert a screw. To hang a picture, for example, you could screw a nail into the strip at the point directly above where you want the picture to hang.
Put a screw on one end of a piece of wire, then attach the other end to the hook on the back of the picture.
To adjust the height of the picture to the ideal level, you can either increase or lower the wire.
Hanging Without Picture Rail
It is optional for you to install a picture rail if you do not already possess any or wish to do not do so. I still have some helpful suggestions for you regarding putting things on plaster walls.
The first order of business is to put away the hammer. Plaster can be quickly knocked loose from the lath that it is supported by if nails are hammered into the plaster.
You might not see the damage at first, but when the plaster breaks loose from the lath, it will ultimately start to sag, and if the sagging continues uncontrolled, it will finally fall off the wall.
Products That Weigh Little
When it comes to hanging objects on plaster walls that do not have picture rails, your best option is to use screws (and screws with masonry anchors for hanging heavy items). In most cases, it is sufficient to merely screw into the plaster using a drywall screw measuring 1 1/4 inches in length in order to secure lighter things.
To ensure that items remain hung, it is preferable, in my opinion, for the screw to penetrate the plaster and hit the wood lath behind it.
This provides a little bit of additional holding strength.
In most cases, you will be able to determine when you have hit the lath because the screw will grab more firmly.
If you are unable to find the lath the first time, simply unscrew the screw, move it about half an inch in either direction and try again.
Things of a Weighty Nature
When supporting heavier goods, you should use a screw that is at least two inches long and screw it into a stud. Stud finders are not very effective when used on plaster; nevertheless, you can use the magnet method to locate the studs.
Hanging Pictures On Plaster Walls
Now that you are aware of what is located behind you, you should realize that there is a significant amount of lath.
Because the lath is so sturdy, that is an excellent feature to have if you want to hang things on your wall.
Although it is not quite as strong as a stud, lath is still strong enough to allow you to hang pictures, curtain rods (see my experience here), and other light to medium-heavy objects directly from it without the need for an anchor.
Identify Where You’ll Hang the Picture
It is to your advantage to have a little bit of flexibility, especially the capacity to shift your position by an inch in either direction.
And you've probably already figured this out, but because plaster walls can be picky if you've got a crack in the wall, it's also a fantastic distractor to hang your picture on top of the crack.
If you have a crack in the wall, it's also a great distractor to hang your picture on top of the crack. If you can conceal everything, it would be the best-case scenario.
After you have determined where you want to hang the image, make a mark on the wall with a pencil at that location.
Find the Lath
Try drilling a small hole in the wall and observing whether or not you strike any wood. If you contact wood while drilling, the drill will continue to require pressure even after stopping. The drill will suddenly thrust forwards against the wall if you come into contact with air while you are using it. When hanging light objects on plaster walls, you want to hit wood whenever possible.
If you hit wood, that's fantastic, you can on to the following level.
In that case, you most likely discovered a gap between the individual pieces of lath. Try again after moving the drill up or down by about half an inch. At least try to avoid hitting wood this time! An important thing to keep in mind is that plaster can quickly dull drill bits.
I always have a "plaster wall bit" on hand, a special drill bit only used on plaster.
Because of this, I won't have to worry about wearing out drill bits whenever I need to hang something on the wall.
Drive the Screw Into the Wall
If you hang the painting with a picture hanger, screw it to the wall rather than using a nail. You want that screw to grip the board well, whereas a nail will merely sit in the hole you bored.)
In that case, you should screw the hook directly into the wall and then hang the picture from the hook.
Hanging Other Light Items From Plaster Walls
Find the Lath
Determine the best spot for your hanger, then make a mark on the wall using a pencil. Following the steps outlined in the last section, drill a small hole in the wall and mentally note whether or not you strike wood.
If you succeed, that's fantastic! If that doesn't work, either go up or down half an inch and try again.
Drive Your Screw Into the Wall
Put the screw into the wall through the hole that you previously drilled for the pilot hole. To be on the safe side, exercise caution and check that the screw is driving into the lath in the manner that you anticipated.
Hanging Heavy Objects From Plaster Walls
Heavy objects are a challenge when attempting to hang them because they need to be hung from the studs. It is easy to locate the studs when working with drywall because the nails that secure the drywall to the stud are often only a layer or two of paint and joint compound away from the surface.
Those nails are simple to locate when you use a magnet, which also makes it easier to locate the studs. However, the nails that secure the lath to the studs in walls made of plaster are covered by a layer of plastic, so they are not visible.
Stud finders that use magnetic induction have difficulty locating these nails, and electric stud finders are typically unreliable when used on plaster walls.
However, if you keep reading, I will reveal several additional strategies for locating studs under plaster walls.
Find the Studs
A few indicators can point you in the direction of the studs, even if stud finders won't detect them through plaster walls. The standard distance between studs is either 16 inches or 24 inches. Studs are typically located near openings in the wall, such as windows, doors, and electrical outlets. Additionally, there is almost always a stud in each of the room's four corners.
Find a stud by drilling a small hole in one of those locations, preferably the one that is located closest to where you will be hanging things, and proceed to the next step.
The bit of your drill ought to first 1) pass through the plaster, then 2) pass through the lath, and 3) enter a stud.
After locating the stud, proceed to measure 16 inches; you should come across another stud at that distance. You usually won't need to test this location unless anything goes wrong; instead, just continue measuring in 16-inch increments until you are as close to the position where you want to hang your item as you can get. After that, you should drill a hole in the wall to check for studs. If you are having trouble seeing it right away, try moving to the left or right by one inch and looking again.
If you drill small holes, it shouldn't be too much of a concern because they'll be easy to touch over with a little paint. Try not to worry too much about drilling holes. If you are having trouble locating the stud, you should repeat the process, but this time measure 24 inches rather than 16 inches between each pair of studs.
One More Thing: The magnet trick also entails suspending a powerful magnet from a string and carefully repositioning it until it adheres to a certain location on the wall.
This method is quite similar to the magnetic stud finders, but it has never worked for me on any of my plaster walls. Perhaps you will have more luck with it.
How to locate studs in a wall
You will need to use a magnetic stud finder to identify the location of a wall stud. Stud finders are able to do their job by locating and identifying the metal nails that are embedded in the wall studs. After you have discovered one stud, you can easily locate the remaining studs by simply measuring 16 inches (the typical distance between studs) on either side of the first stud.In order to mount a picture on a wall stud, you can make use of long wooden plaster screws.
It is strongly suggested that you drill a hole in the plaster first, as this will significantly lessen the likelihood of the plaster breaking.
Putting a piece of masking tape over the region that will be drilled into is another recommended procedure to follow for optimal results.
Secure Your Screw Into The Stud
You can now safely use the hanger or bracket you have been searching for by inserting your screw into the pilot hole leading you to the stud.
How to Hang On Plaster-Walls With a Picture Hanging System
Utilizing a picture hanging system such as an all-in-one click rail cable hanging kit is the most effective method for dealing with the challenge of hanging pictures on plaster.
Installing a rail along the length of the wall is all that is required to make this system function.
Once the rail is in place, images can be hung from cables that are attached to the rail and secured with hooks.
When it comes to hanging and rehanging wall decorations, you will always have flexibility at your disposal because the hanging wires may be clicked onto or pushed into the rail at any location you choose.
It also offers any area in your house a one-of-a-kind aesthetic that is reminiscent of a museum, whether you use it to hang large works of art in your living room or more intimate images in your office space.
How Much Weight Can a Picture Hanging System Hold?
Because the weight of a picture is dispersed along the full rail, it can take up to 300 pounds.
As a result, it is the best alternative for hanging objects on plaster walls because it can hold that much weight.
The sample that was linked earlier can include up to four images.
This method prevents damage to the walls, is adaptable to a variety of wall decorations, and is capable of holding heavy things for an extended period of time!
Hanging Objects From Plaster Walls With Drywall Anchors
Plaster walls can have drywall anchors attached to them like they would be attached to drywall.
On the other hand, there are numerous situations in which they are not required because it is much simpler to insert a screw into the lath.
When hanging a huge piece of artwork on a plaster wall, I only use drywall anchors after I've secured other screws into the lath or studs.
In such instances, I will use a drywall anchor if the second, third, fourth, etc., screw location does not align with the location of the lath.
When hanging things from plaster walls, I never just use drywall anchors because it's so simple to strike the lath, and that's a more secure way to hang things than using drywall anchors alone.
When hanging heavy items, you should always be sure to secure them to at least one stud, and drywall anchors should be used as secondary support.
Fixing Small Holes In Plaster Walls
If you have just finished spending a lot of time drilling a bunch of little holes in the wall in an effort to locate a stud, then you are probably also interested in learning how to fix those holes.
Fortunately, even the smallest holes are simple to patch.
Plaster walls with small holes should not be restored so much as they should have a patch applied over the damaged area.
Get some paint that goes well with the rest of your wall and use that to fill in the holes.
Put a little bit of joint compound into the holes first, and then apply a coat of paint over it if the holes are still visible after the paint dries.
The holes should be painted after the caulk has had time to dry.
Conclusion
Plaster walls are an old type of wall made up of lath attached to wall studs and covered in plaster. They are more brittle than drywall or concrete, so it is important to make decisions that prioritize the condition of the plaster wall. Masonry walls are made of bricks or blocks, and picture rail is installed to protect the walls and make life easier.
It works by nailing to the studs, and pictures can be hung on wires or hooks. Hanging pictures on plaster walls without picture rail requires hammering nails into plaster, using a 1 1/4" drywall screw for lighter items, and using a 2" screw for heavier items.
Identify where to hang the picture and cover any cracks. Mark the spot with a pencil, drill a small hole in the wall, drive a screw into the wall, and secure heavy objects from the studs with a magnet or electric stud finder.
Find a stud by drilling a small hole and measuring 16 inches on either side. Try the magnet trick and use a magnetic stud finder to locate the other studs.
Drill a hole and secure the screw into the stud, then use a picture hanging system like the all-in-one click rail cable hanging kit to hang up to 300 pounds. Hang heavy objects from plaster walls with drywall anchors, or fix small holes in plaster walls with paint and joint compound.
Content Summary
- However, when it comes to hanging heavy objects, they can present a challenge.
- If you're wondering how to hang heavy things on plaster walls without damaging them, you've come to the right place!
- The biggest challenge in dealing with plaster walls is that this type of wall is more brittle than, say, drywall or concrete.
- With plaster walls, you will have to make decisions that prioritize the condition of the plaster wall.
- In this comprehensive guide, we'll walk you through the process step by step, providing you with the knowledge and confidence to successfully hang your prized possessions.
- Picture Rail If you're one of the fortunate ones, you may have picture rail in some of the rooms of your home.
- Picture rail was installed to give you a place to hang things like mirrors, art, pictures, and anything else you want to decorate your walls with without putting holes in your plaster.
- After all, it is just a piece of wood molding.
- For instance, drive a screw into the strip on the spot just above where you want to hang a picture.
- Attach one end of a wire to the screw and the other end to the hook on the back of the picture.
- You can raise or lower the wire to get the picture to the correct height.
- Hanging Without Picture Rail If you don't have a picture rail or don't want to install some, that's just fine.
- Hammering nails into a plaster is a quick way to knock plaster loose from the supporting lath.
- Light Items Screws (and screws with masonry anchors for heavy items) are your best choice for hanging things on plaster walls without picture rail.
- That's great for hanging stuff on your wall because the lath is strong!
- Once you've figured out where you want to hang the picture, mark the spot with a pencil.
- Find the Lath, Drill a small hole in the wall, and note if you hit wood or not.
- You're hoping to hit wood when hanging light objects on plaster walls.
- Drive the Screw Into the Wall If you're using a picture hanger, secure it to the wall using a screw (not a nail.
- Find the Studs Even though stud finders won't detect studs through plaster walls, there are a few clues that can tell you the location of studs.
- Then test for a stud by drilling a hole.
- How to find a wall stud To locate a wall stud, you'll need to use a magnetic stud finder.
- A long wooden plaster screw can hang a picture in a wall stud.
- The ideal solution for hanging pictures on plaster is to use a picture-hanging system like the all-in-one click rail cable hanging kit.
- Hanging Objects From Plaster Walls With Drywall Anchors Drywall anchors can be used on plaster walls the same way they'd be used on drywall.
- I only use drywall anchors on plaster walls when I've gotten other screws into the lath, or a stud and I'm hanging a large piece.
- I never use drywall anchors alone when hanging from plaster walls, simply because it's so easy to hit lath, and that's a more secure way to hang things.
- Heavy objects should always be secured to at least one stud, with drywall anchors serving as secondary support.
- Luckily, small holes are easy to fix.
- Grab some paint that matches the rest of your wall, and fill in the holes with the paint.
Frequently Asked Questions About Plaster Walls
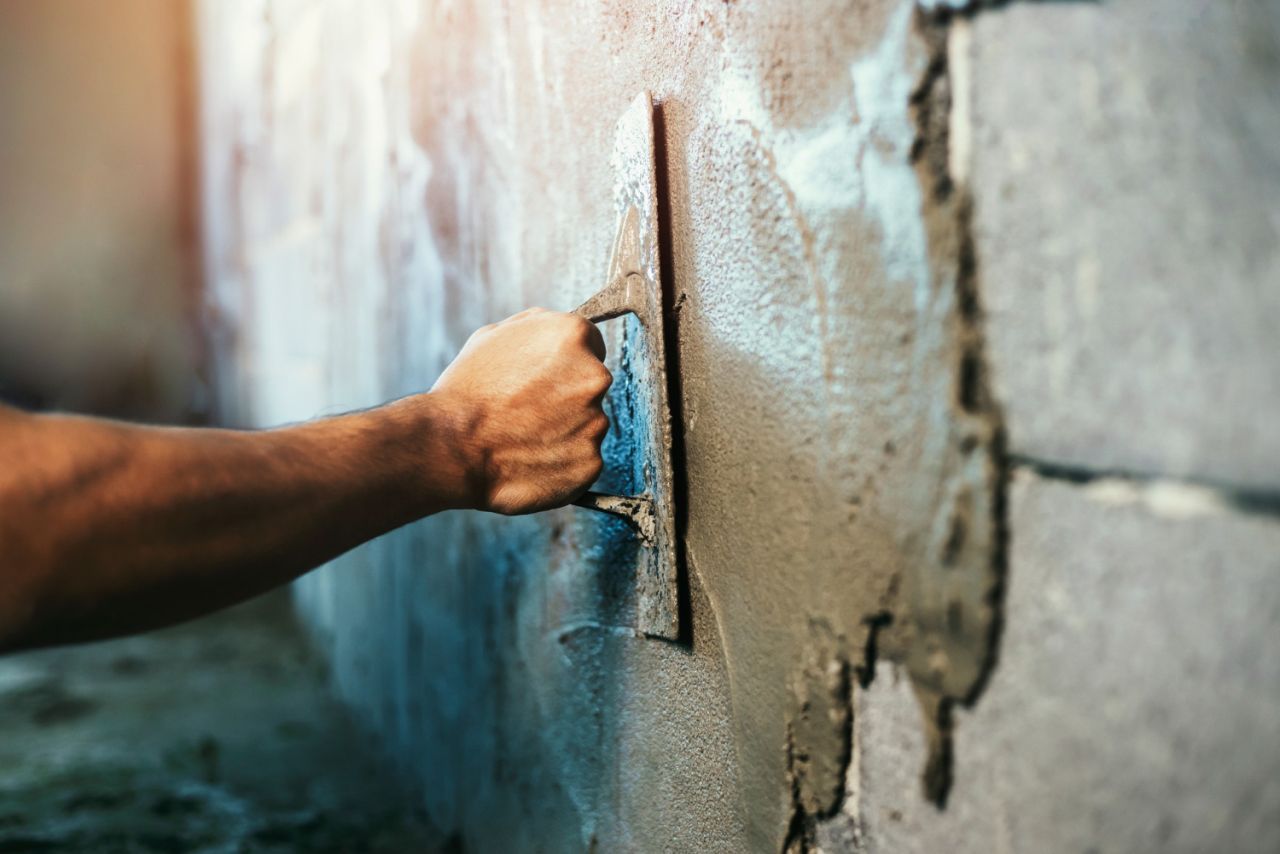
The secret is to remove any loose areas of existing plaster, dust or paper as much as you can before even contemplating plastering.
Next, the surface must be treated with a mixture of PVA glue and water (the exact mixture depends on your type and is covered in our plastering course in some detail).
Plaster can be easily painted with the same techniques as drywall.
Even with a good coat of primer, plaster walls are notoriously thirsty for paint.
Using a roller for open spaces and brushes around trim and borders, spread an even coat of your choice of paint.
Try to cover the wall in a manageable amount of time.
Avoid getting small objects, powders and sprays inside your cast, as they could irritate your skin. do not try to alter the length or position of your cast. only lift something heavy or drive once the cast has been removed. use crutches or a sling as advised by your health professional.
Plastering can be physically demanding work, so a level of physical fitness is important.
It is a very versatile job as many diffrent times of construction from residential to commercial buildings, need plaster, so you will be kept engaged with a diffrent site to work on constantly.
Generally, it will take around 3-5 days for plastering to dry out however, there are a few factors that will affect the drying time of your plaster.
The thickness of the plastering will affect the time it takes for the plaster to dry out.


