Plaster walls that are in pristine condition are frequently a selling point for homeowners and buyers of properties.
They are not only aesthetically pleasing but also quite robust and make an excellent sound barrier. In spite of this, it is not abnormal for plaster walls to develop cracks as a result of the unavoidable movement of the foundation or the alterations in the weather.
Plaster walls are susceptible to damage from the knocks and thuds that are a part of everyday life. Cracks in the window and door glass are an almost inevitable occurrence in plaster-walled homes over time. Your damaged plaster walls are not beyond repair despite the fact that they may give off a gloomy appearance.
Plaster walls with spider cracks or small fractures can be swiftly repaired using drywall tape, joint compound to fill the gaps, and sandpaper to make the surface look even again.
Even a specialised plaster repair kit is optional in this situation.
What follows is a rundown of everything you need to know about cracks, including what causes them, when you should be concerned about them, and how to fix them.
What Causes Cracks in Plaster Walls?
Plaster cracks are not uncommon and should be anticipated in a home of any age, regardless of how long it has been on the market.
During the first ten years after construction, it is not uncommon for a house to develop hairline and other tiny cracks as it settles.
Plaster is more likely to crack in areas that have undergone significant climatic change or homes that lack climate control and are subject to severe temperatures.
The majority of cracks are merely cosmetic and may be repaired with relative ease.
Large cracks and plaster that are falling apart, on the other hand, may be indicators of more significant issues that warrant concern, such as water damage or structural issues.
These are some of the most typical causes of cracks in plaster:
- The house is adjusting itself to its base.
- Climate regulation, as well as the ever-changing weather
- Damage caused by water and leaks (including stains and bubbling).
- Incorrect installation or plaster that has dried out
- difficulties with the foundation and the structure caused by termites and other pests
Plaster Repairs Definition
When your walls begin to show signs of age as a result of the effects of the elements and other causes, you will frequently require plaster repairs.
The procedure entails putting numerous layers of carefully selected materials to a wall or ceiling in such a way as to shield it from future harm while also contributing to the preservation of its initial form.
You can accomplish this by injecting mortar into the cracks in your drywall before covering them with spackle and paint over them.
It is also possible to employ plaster patches and finishing coats, which protect small areas where there was once obvious water penetration and eliminate odours caused by mould growth.
This is a different alternative to using waterproofing materials.
It is imperative that you keep up with the maintenance of your plasterwork since it plays an important role in preventing the buildup of moisture.
This will ensure you avoid issues such as sagging ceilings or broken foundations.
Types of Plaster Cracks
The pattern of cracking in the plaster can provide information about a number of different factors, including the possible source and the degree of the problem.
In many instances, the problem becomes less significant as the issue's size decreases. However, a crack is not simply a crack that transforms into a damaged wall when the gap is at least one inch wide.
Subsidence might be indicated by a damaged wall with a huge gap. When the ground beneath a house moves and sinks, it can cause the structure and its foundation to begin to sink as well.
This phenomenon is known as subsidence.
Because of this significant issue, the home's foundation will need to be repaired, most likely by means of underpinning, to ensure it does not collapse.
- Cracks as fine as a hair or as wide as a spiderweb: These cracks are harmless; they are so little that you can't fit a fingernail in them even if you tried. There is no reason to deal with them unless you want to make a cosmetic improvement to how they seem. Plaster can develop fine cracks as a result of drying, which causes the material to expand and then compress.
- Bulging: Plaster with lumps in it will develop microscopic cracks radiating out from the lumps. Typically, a straightforward issue such as delamination, in which the plaster's exterior layer becomes separated from the plaster's inner layer, is the root cause of bulging. It's possible that the only thing that needs to be done is to scrape off and repaint the top layer.
- Plaster that has bubbles or a discoloured appearance: If you see fractures in the wall that have bubbling, dampness, discolouration, or stains from water, this is a strong indication that water is getting inside the wall. Water from the outside is leaking in, or a pipe inside the walls has burst and caused a leak. This is a symptom of a more significant issue, which must be fixed immediately.
- Cracks that are either diagonal, horizontal, or vertical: These cracks, which look like streaks, are actually structural fissures that were formed by foundation movement, the expansion of moisture, or the drying and shrinking of plaster. The first ten years after a plaster installation see the highest incidence of these issues.
- Large fractures: A crack with a width of one-fourth to one-half of an inch is troublesome; it is an indication that something is going on that is more serious than the house settling or having issues with temperature management.
Ideas for DIY Plaster Repairs
Do-it-yourself plaster repairs are your best bet if you want to put minimal effort or time into the project.
The upcoming article on this blog will walk you through some straightforward do-it-yourself repair projects that require only a few basic materials and techniques.
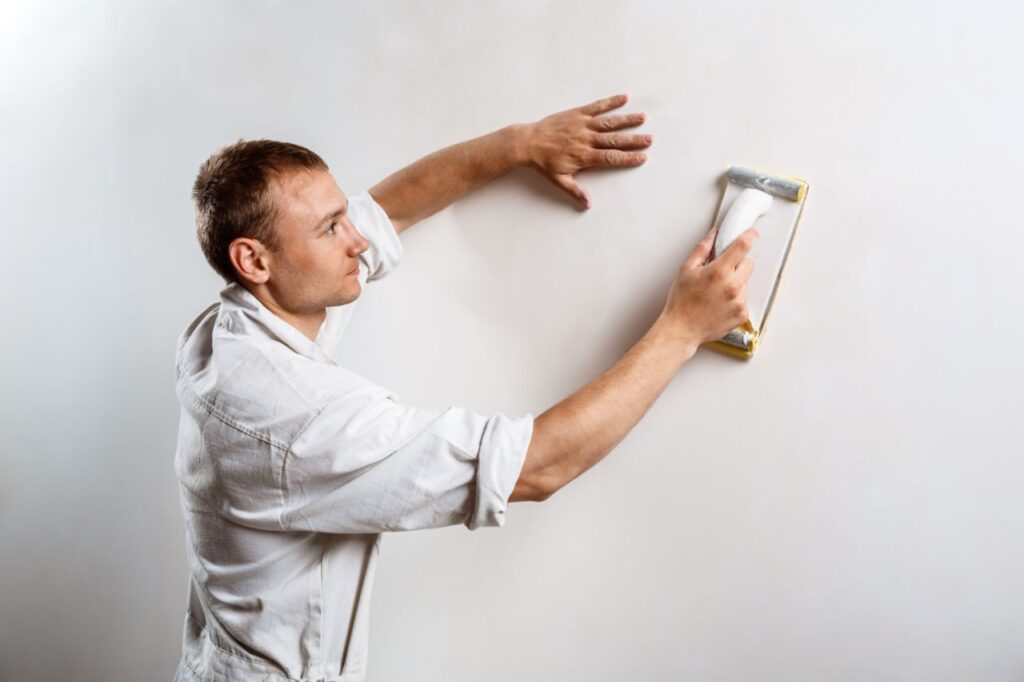
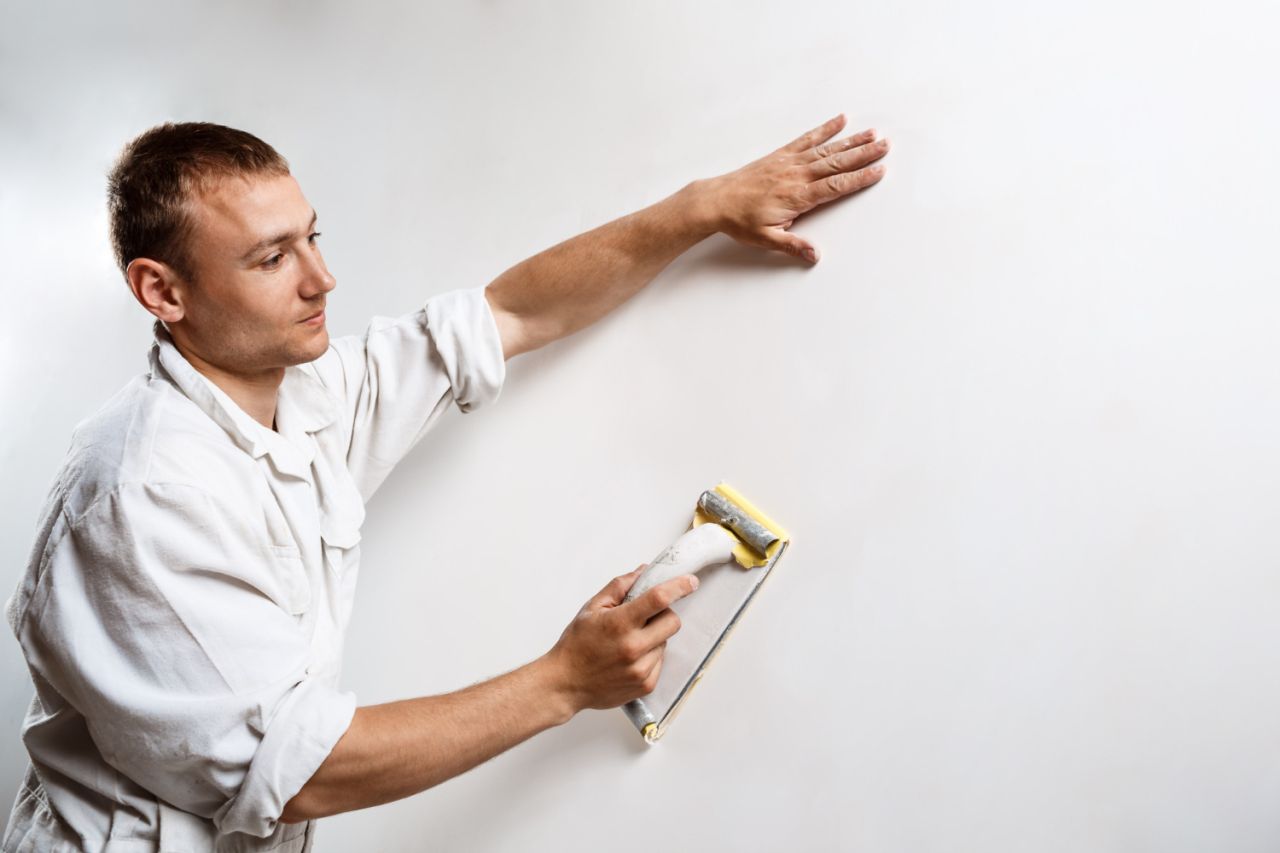
Crack Repairs
Cracks in a house can not only detract from its aesthetic value but also have the potential to cause damage to the house's structural components if they are not repaired. The good news is that there are many tools that you will need to fix any cracks in your home, and the only other thing that is required is some joint compound.
You are going to need the following supplies: a scrapper; cloth pieces (to clear dirt from holes before applying filler); a putty knife; paint or primer; sandpaper blocks with fine grits such as 120-grit up to 300-grit depending on the size of the region that requires filling or repairing.
When all of these components have been assembled, you can use them as follows: Use a scraper to remove any loose debris that is around the hole's edges.
While doing so, make sure to use protective gloves and follow the contours of the hole as closely as possible.
Fixing Holes
You can turn the situation around with just a basic toolkit. Get a hold of some suitable patching material and plaster so that any cracks or holes that need repairing can be filled in!
The first thing you need to do is scrape away any old paint edges that are located around the hole (or area).
After thoroughly cleaning it, dampen it with water so that it will have a higher chance of adhering to the drywall joint compound before laying the patches and plasters together. Allow it to sit out overnight to get the best possible outcomes!
Common Mistakes During Plaster Repairs
When repairing plaster, a common error is to cover the hole with a new layer of mortar, which is a mistake that many people make. If you do this, your original surface could sustain additional damage, potentially needing an expensive restoration process or repair work.
Cracks and holes are easier and more effective to repair when performed by an expert.
On the other side, the do-it-yourselfer might not be able to recognise the errors they are making, which could result in severe plaster damage. For this reason, it is advisable to engage a pro to handle the job so that you can avoid any unexpected results!
Essential Dust Removal of Old Plaster
When it comes to do-it-yourself projects, dirty surfaces are a regular obstacle, but it's vital to remember that this makes the bond between the filler or patch and the existing areas less stable.
If you do not clean your surface adequately beforehand, dust and grease will make the removal of materials from these damaged sections significantly more difficult than it would have been if they had been cleansed first.
The older pieces of plaster provide strong links between themselves and other structures beneath them.
However, cleaning before removing old pieces of plaster helps prevent hurting larger sections and better what remains in place by maintaining what is still in place.
Applying an Improper Damp Layer
The procedure of filling walls requires the application of a layer that is moist at all times.
Water helps dampen the surface so that new compounds may adhere well without leaving unattractive gaps or bumps in the wall.
This is necessary because the new surface needs to form a strong bond with what is currently there.
It is also helpful to make sure that everything has been covered before moving on to the next phase.
This helps save time because it prevents you from having to go back over areas for missed portions at a later time.
Wrong Filler Material Selection
While certain fillers are suitable for use both inside and outside, others should only be used inside. The ability of different materials to keep moisture out or in varies.
For instance, some materials do not allow water vapour to escape, while others may allow a building envelope's structure to breathe freely.
Because customers run the risk of being stuck with things they don't desire, it is critical to have a clear idea of what it is that they require before making any purchases.
When placing an order online, it is beneficial for both the buyer and the seller to have as much information as possible about the product before the transaction takes place.
This reduces the likelihood of any unwanted returns occuring as a result of misunderstandings over the type of filler material that either party requires.
Quick Fix Plaster Repairs to Walls
There have been cracks in my wall for some time now, but the idea of repairing them has never crossed my mind. It is really simple to do as well! Plaster, sandpaper, and putty knives are all that are needed for this project.
After that, you must combine the two components with some water and wait for the mixture to harden before applying it to your walls.
It would appear that some individuals are always looking for a quick fix in today's society. And how about if something can be done speedily and with little bother?
That is something that appeals to me since, in this day and age, who has time?!
So, let's get this discussion started: how can those of us who may not know a lot about repairing homes mend holes or cracks in the walls of our own homes?
Plaster powder, sandpaper, and putty knives are the only things you'll require to complete this task; it turns out that's all you need.
Tools and Materials Required for Repairing Plaster Walls
Plastering your walls can be a difficult and time-consuming endeavour. It would be helpful if you had the greatest equipment and resources to accomplish it correctly; if you didn't, you could run into some significant problems in the future.
Keeping this in mind, the following is a list of things you will require:
- Putty Knife or Trowel, Scaled Down to Medium Dimensions
- Plaster's mixing trough or tray
- Sandpaper or sponges can be used for dampening and finishing.
- Plaster compounds that have already been pre-mixed or joint compound
- Primer and paint for the purpose of finishing.
- If necessary, because of the chilly temperatures, it is drier.
Plaster vs. Drywall Repairs
If you have ever attempted to repair drywall, you may already know that replacing entire sections with new pieces of drywall is frequently simpler. However, removing just the bit that needs patching and a few inches beyond without the wall as a whole falling in on itself is feasible. When you cut through drywall, the only things that are behind it are the studs and the insulation.
This is because drywall is a single layer that does not have a backing. On the other hand, plaster walls are made up of two layers: the plaster that covers the outside and the wooden or metal lath that covers the inside.
Instead of tearing out the existing plaster, it is in your best interest to maintain and repair the plaster that is already there.
The process of ripping off chunks of plaster can frequently become what appears to be an unending cycle, as one chunk leads to the next chunk.
Plaster crack repair entails doing one step at a time and having the patience to apply many layers of drywall joint compound to the wall.
What You'll Need
Equipment / Tools
- Knife or tool with five functions in one
- Shop vacuum
- Scissors
- 6-inch drywall knife
- a drywall knife measuring 12 inches (optional).
Materials
- Compound for drywall joints and seams
- Paper drywall tape 150-grit sanding sponge
Instructions
-
Score the Crack
You should use a utility knife or a painter's 5-in-1 tool to cut along the borders of the crack. This will remove any loose material as well as open up the crack.
It can appear paradoxical to widen the fracture, but in order for the joint compound to adhere properly, the surface area needs to be increased. Be careful not to scrape too roughly into the crack; instead, take your time and move slowly.
You may eliminate all of the crumbs and dust in the crack by using a shop vacuum.
-
Cut the Paper Drywall Tape
Paper drywall tape should be measured out and cut to the appropriate length(s) in order to cover the crack. Cutting the tape ahead of time makes this process go faster and prevents mistakenly creating creases, folds, or bumps in the drywall compound by reducing the risk of unintended creasing, folding, or bumping.
Cutting the tape with scissors or a utility knife rather than tearing it by hand is best because this will result in a jagged edge.
-
Spread the Joint Compound
Prepare the joint compound for the drywall as required. Using a drywall knife with a blade measuring 6 inches, remove a small amount, and then apply a thin layer of joint compound over the crack, leaving a passage slightly wider than the paper tape. Because the joint compound dries so quickly, you should immediately move on to the following step.
-
Apply Tape to the Crack
Hand-apply the tape to the muck, then use the knife with a 6-inch blade to make one or two passes over it to smooth it out. The tape must be smoothed out and brought into full contact with the compound for this step to succeed.
There should be no wrinkles or air pockets in the tape. Take care not to overwork the tape, as this could cause it to tear.
Wait until the joint compound is totally dry before proceeding.
-
Mud Over the Tape
Using the knife with a 6-inch blade, spread a coating of joint compound over the region that has been taped in such a way that it spreads beyond the edges of the tape. The compound should be smoothed out until it is level with the surfaces around it. Wait until the joint compound is totally dry before proceeding.
-
Sand the Repair
Using the knife with a 6-inch blade, spread a coating of joint compound over the region that has been taped in such a way that it spreads beyond the edges of the tape. The compound should be smoothed out until it is level with the surfaces around it.
Wait until the joint compound is totally dry before proceeding.
-
Apply an Additional Mud Coat (Optional)
To make the edges reach even further out, apply a third layer of joint compound, but this time use a knife that is 12 inches long.
This step is completely optional, but it does assist blend the repair into the wall surface and make it look much smoother.
If the surface already has some texture, it is typically best to take the opposite approach and minimise the breadth of the repair because it is difficult to texture the new compound. This is because the repair will be more secure. With one more application, the joint compound needs to be spread out to a distance of twelve inches.
After the joint compound has had a chance to cure completely, the area that has been repaired should be lightly sanded.
Sanding should be done very lightly, as this should not be done so deeply as to penetrate the paper tape.
-
Clean the Area
Using a shop vacuum, clean the affected area as well as the surrounding area, and then wipe it down with a dry cloth.
How to Fix Uneven Walls
The appearance of an entire room can be ruined by a single wall that is not level, but there is typically a solution to this problem that only requires significant remodelling or building work.
Acquire the skills necessary to rectify uneven walls by applying the appropriate wall treatment or, if necessary, performing some fundamental repairs.
Cover It With Paint
It's possible that simply painting over the low spots on your freshly painted wall will be enough to make the surface even out and make the wall look smooth. Applying the paint uniformly requires the use of a roller. To ensure that the touch-ups blend seamlessly with the surrounding paint, use the same paint you most recently applied.
If the previous paint job has worn out, you may need to repaint the entire wall, paying particular attention to the lower areas, to get an even finish and colour across the space.
Although you might still feel some unevenness in the wall with your hands, the surface should appear even to the naked eye.
A painted pattern with varying shades of colour can help cover unevenness by breaking up visible lines.
Painting using a sponge or a rag are two simple techniques that can be used to generate diversity.
Start by painting the wall in the colour of your choice. The next step is to select a colour that is either a lighter shade for a more subtle change or a very contrasting colour for a more eye-catching appearance.
Make the application of the second colour as haphazard as possible by dabbing it on with a large sponge or a rag.
Alternatively, you may try experimenting with a paint roller with a rough surface, a stippling brush, the colour wash technique, or colour combinations that mimic stone or concrete.
Sand Down the High Spots
Sanding down the high portions of a wall with regions of paint or plaster less than a quarter of an inch higher than the lowest areas will offer you better results than painting such areas. The goal is to achieve a totally even surface so that you can paint over it.
Sandpaper with a very fine grit, anywhere between 320 and 400, is what you'll need to smooth out any minute unevenness in the surface.
To smooth out paint globules, select a grain that is coarser, at around 80.
Sanding off the top layers of paint using either a block and paper or an electric sander under light pressure will expose the paint that is deeper in the layering process.
Sand against the grain of the wood if the wall is made of wood to prevent the wood from becoming damaged.
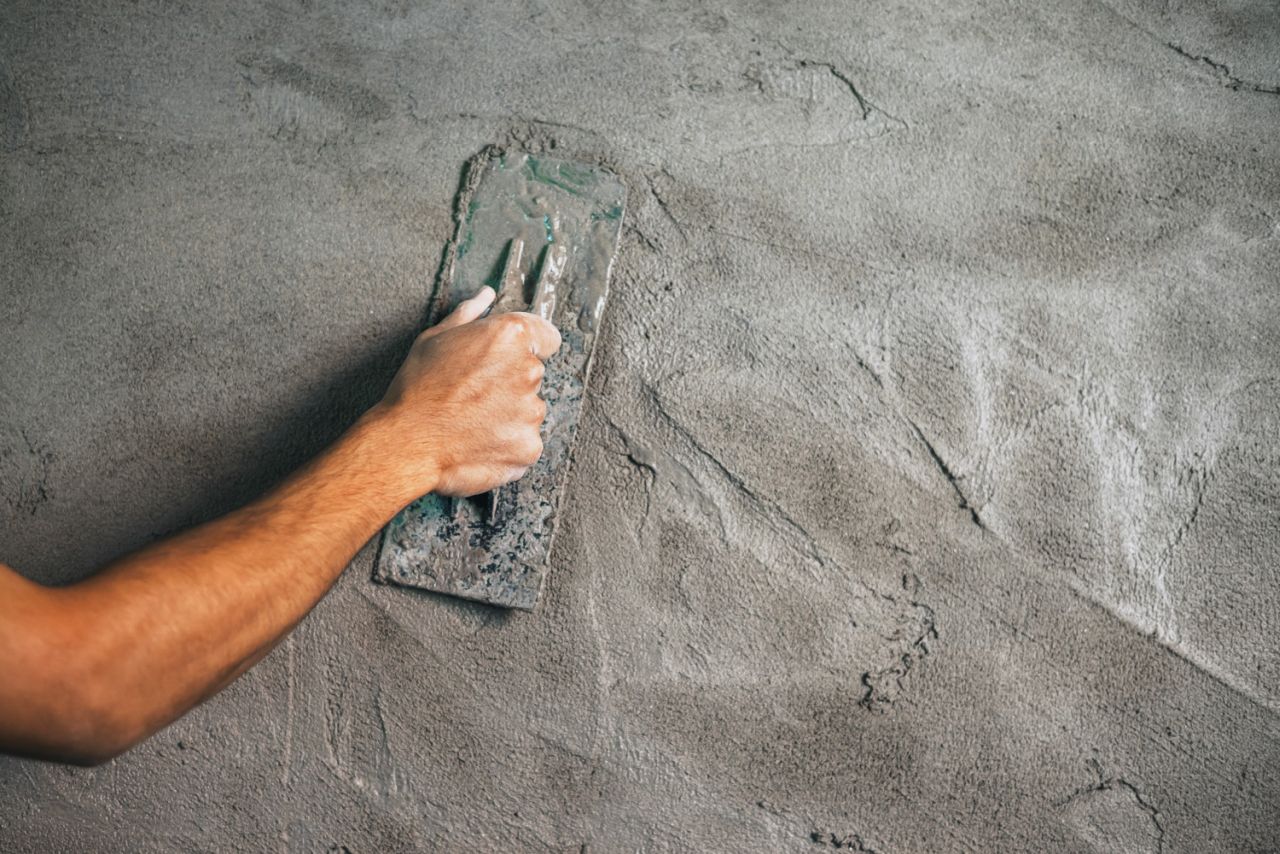
Plaster Over the Low Spots
Plaster's thickness makes it a great material for levelling off uneven sections that are more than a quarter of an inch in depth. Plaster any noticeable low spots on the wall, even if they are only a few square inches in size, and then repaint the entire wall.
If you have larger low sections, you can balance things out by plastering the entire wall and adding a little extra plaster to the low regions after you have finished plastering the entire wall.
Plaster with a textured finish is even more effective at concealing unevenness than plain plaster.
The use of troweled finish plaster is currently fashionable, but wood grain, stone, sand, and tadelakt from Morocco can also look quite nice.
It is easy to plaster a wall, but one must have some knowledge in order to achieve a nice finish.
Another straightforward and inexpensive medium for repairing extremely uneven walls is stucco, which has a greater thickness than plaster.
This wall covering is available in a variety of textured options, ranging from smooth to coarse.
It is typically sold as a base material that is either white or off-white, but you have the option of colouring it using powder, liquid or painting the finished walls.
Apply Elastomeric Wall Coating
Elastomeric wall coating, also known as EWC, is applied in a manner analogous to painting.
However, because it can be up to ten times thicker than conventional paint, it is frequently employed to achieve smooth coverage on stone walls with uneven surfaces.
It is possible for it to disguise flaws, but it will not hide considerable unevenness.
Sanding off the layer of damaged paint that's already on the wall should be the first step in preparing it for application.
Think about working with an experienced person for this task.
EWC has a distinct mode of operation than conventional paint and is more difficult to apply.
Incorrect application can result in a coating that is bumpy and more prone to cracking.
Replace or Add Drywall
If the studs behind the wall are even and in good shape, but your wall is uneven because the drywall is warped or bowed, you can fix the problem by replacing the damaged drywall.
The job of replacing only a few panels is quite straightforward and inexpensive, but it does require some planning and work on your part. You will need to cut out the damaged section, accurately measure the replacement, and either attach the replacement to the studs or add wood strips in between the studs and then attach the replacement to those.
Make sure the problem that caused the wall to distort, such as an accumulation of moisture, has been resolved before trying to straighten the wall. Drywall can also help you produce a completely smooth surface on surfaces that are exceedingly rough, such as brick, concrete, or wood panelling.
This approach is only viable if the wall is clean and in good shape; therefore, it is important to fix any broken or disintegrating portions before proceeding.
When it comes time to apply the drywall, it is frequently simpler to utilise the dot and dab method, also known as dry-lining, rather than wet plastering.
This is because dry-lining does not require the use of water. In this step, glue is first applied in small dots on the drywall or the wall, and then the drywall is attached to one of the surfaces.
Adjust the Framing
Sometimes the framing behind a wall will lead it to be uneven, even though there is nothing on the surface that would cause it to be uneven. This occurs when one of the wall studs is either out of alignment or deformed.
If you are able to access the studs behind your wall, you can re-align a stud that is slightly crooked by tapping it with a hammer until it moves into position and then inserting another nail to secure it there. This solution is only applicable if you are able to access the studs behind your wall.
There is also the possibility of planning down the side of the stud that projects outward. Adding a shim to a wall that does not carry the weight of the building's load can help straighten out a stud that has been twisted or bowed. To accomplish this, first make a shallow incision about a quarter of the way through the concave side of the stud, and then push a shim into the resulting opening.
Reinforcing the stud by scabbing both sides with 4-foot lengths of 2x4s will help it to maintain its straight alignment. Paint, plaster, or another wall treatment can usually be used to easily level out the majority of walls that only have surface unevenness.
Fixing uneven walls with deeper issues, such as damage or installation defects, requires a bit more effort, but it is still something that most do-it-yourselfers can complete in a single day.
Conclusion
Homeowners and homebuyers often value homes with plaster walls in prime condition. However, it is normal for plaster walls to respond to inevitable foundation shifts and climatic changes by forming cracks. You'll need some drywall tape, joint compound, and sandpaper to quickly fix a plaster wall with a spider or narrow cracks.
The causes of cracks in plaster walls are common and to be expected, whether your home is five years old or 100 years old. Hairline and minor cracks are common as a home settles in its first 10 years.
Drastic weather changes or homes without climate control that experience extreme temperatures are more prone to plaster cracks.
Large cracks and breaking plaster can be signs of serious issues to worry about, such as water damage or structural problems.
Plaster repairs are often needed when walls begin to show signs of age due to the elements and other factors.
The process involves applying different layers of selective materials that will protect against further damage while also helping preserve the original shape of a wall or ceiling.
Types of plaster cracks can tell you several things, such as the potential cause and severity of the issue.
A large gap can signify subsidence, which occurs when the house and its foundation begin to sink due to the ground beneath it shifting and sinking. This major problem requires foundation work, likely underpinning, to ensure the home remains stable and does not collapse.
The most important details in this text are the tools and methods for repairing plaster damage.
These include a scrapper, cloth pieces, putty knife, paint or primer, sandpaper blocks with fine grits such as 120-grit up to 300-grit depending on how big of an area needs filling/repairing, an appropriate patch and plaster to fill up any holes or cracks that require repair, common mistakes during plaster repairs, dust removal of old plaster, applying an improper damp layer, wrong filler material selection, and quick fix plaster repairs to walls.
All of these tools and methods can be used to repair plaster damage without spending too much time.
However, knowing what you need before purchasing is important so that there are no unnecessary returns.
Content Summary
- An Enlightening Guide To Repairing, And Renovating Plaster Walls Homeowners and homebuyers often value homes with plaster walls in prime condition.
- They are beautiful, solid, and especially good for soundproofing.
- However, it is normal for plaster walls to respond to inevitable foundation shifts and climatic changes by forming cracks.
- Nearly all homes with plaster walls will eventually develop window and door cracks.
- Though they may look ominous, your cracked plaster walls are not beyond repair.
- To quickly fix a plaster wall with a spider or narrow cracks, you'll need some drywall tape, joint compound to fill the gaps, and sandpaper to get it looking even again.
- You do not even need a special plaster repair kit.
- Here's what you need to know about the causes of cracks, when to worry about them, and the instructions for repairing them.
- What Causes Cracks in Plaster Walls?
- Plaster cracks are common and to be expected, whether your home is five years old or 100 years old.
- Drastic weather changes or homes without climate control that experience extreme temperatures are more prone to plaster cracks.
- Most cracks are cosmetic and can be easily fixed.
- However, large cracks and breaking plaster can be signs of serious issues to worry about, such as water damage or structural problems.
- These are common causes of plaster cracks:
- House settling on its foundation Climate control and weather fluctuations Water damage and leaks (stains and bubbling) Poor installation or dried-out plaster Structural damage (termites, foundation issues) Plaster Repairs Definition Plaster repairs are often needed when your walls begin to show signs of age due to the elements and other factors.
- The process involves applying different layers of selective materials that will protect against further damage while also helping preserve the original shape of a wall or ceiling.
- This can be done by injecting mortar into your drywall cracks before painting over them with a spackle.
- Maintaining your plasterwork is essential because it helps keep moisture at bay, so you don't have any problems like leaky ceilings or cracked foundations!
- Types of Plaster Cracks The way plaster cracks can tell you several things: the potential cause and the severity of the issue.
- In many cases, the smaller it is, the smaller the issue.
- However, a crack is not just a crack and becomes a damaged wall when the gap is 1 inch or larger.
- A damaged wall with a large gap can signify subsidence.
- Subsidence occurs when the house and its foundation begin to sink because the ground beneath it shifts and sinks.
- This major problem requires foundation work, likely underpinning, to ensure the home remains stable and does not collapse.
- Hairline or spiderweb cracks: These are benign; they are so small that you can hardly fit a fingernail.
- There is no need to bother with them unless you want to clean them up cosmetically.
- Hairline cracks are usually caused by plaster drying, expanding, and contracting.
- Bulging: Bulges in plaster create small cracks emanating from them.
- Bubbling or discolouration of plaster: If you notice cracks that include bubbling, wetness, discolouration, or water stains, you likely have water seeping into the wall.
- This is a sign of a bigger problem that should be remedied immediately.
- Diagonal, horizontal, or vertical cracks: These streak-like cracks are structural cracks caused by foundation movement, moisture expansion, or plaster drying and shrinking.
- They are most common in the first 10 years of plaster installation.
- Wide cracks: A crack of 1/4 inch to 1/2 inch in width is problematic; it's a sign of something going on that is more serious than a house settling or climate control issues.
- Ideas for DIY Plaster Repairs DIYs are the best option for repairing plaster damage when you want to spend less time on them.
- The following blog post will show you how easy DIY repair can be with a few simple tools and methods!
- Crack Repairs Cracks can not only mar the appearance of a house, but they also have the potential to damage its structural elements if left unattended.
- Fortunately, you'll need many tools to repair any cracks in your home – and all it takes is some joint compound!
Frequently Asked Questions About Plaster Walls
- Remove the Damaged Plaster. Remove the damaged plaster using a cold chisel and a ball peen hammer to chip the damaged plaster off the wall.
- Apply Latex Bonding Agent.
- Apply and Cross-Scratch Plaster.
- Apply the Second Layer.
- Apply a layer of Joint Compound.
If sections or entire walls need attention, don't let the idea of working with old plaster intimidate you.
In many cases, problems with plaster can be fixed. Repairing cracks or patch holes with this versatile material is much easier than with drywall.
Plaster can be easily painted with the same techniques as drywall.
Even with a good coat of primer, plaster walls are notoriously thirsty for paint.
Using a roller for open spaces and brushes around trim and borders, spread an even coat of your choice of paint.
Try to cover the wall in a manageable amount of time.
However, a plaster filler like Polyfilla or a powder filler is the best option for filling plaster cracks, as alternatives such as caulk are best used for other purposes, like sealing gaps around pipes or tiles.
Ideally, plaster needs to be fully dry prior to painting.
Fresh plaster will take around 4-6 weeks to fully dry.
Fresh plaster is porous and will therefore absorb moisture.
If you attempt to paint over plaster that is still damp, the paint is likely to peel off.


