
Are you considering beginning a project to improve your house that will require you to work with plaster walls?
Plaster walls may lend an appearance of sophistication and allure to any room, but renovating or repairing their calls for a unique strategy due to the material's porous nature.
In this extensive guide, we will share some helpful hints and suggestions with you in order to assist you in navigating the world of plaster walls and accomplishing remarkable achievements.
First things first: before we get into the specifics of the tips and tactics, let's define what plaster walls are.
The application of plaster as a wall finish is an age-old technique that has been utilised for many years.
They are created by laying a number of layers of plaster on a framework composed of wooden or metal lath.
Plaster walls are famous for their resilience as well as their one-of-a-kind aesthetic appeal.
What is Plaster?
Plaster is an almost magical building material that can be used to make and cover walls and ceilings when applied with the appropriate amount of creativity and skill.
Plaster was traditionally made by combining dry ingredients such as sand, lime, and bovine hair (or straw or dung) with water to produce a wet, flexible medium that cures and hardens as it dries.
Around 150 years ago, a new component called gypsum was added to the mixture of sand and lime to accelerate the plaster's curing time and make it possible to work with the mixture more quickly.
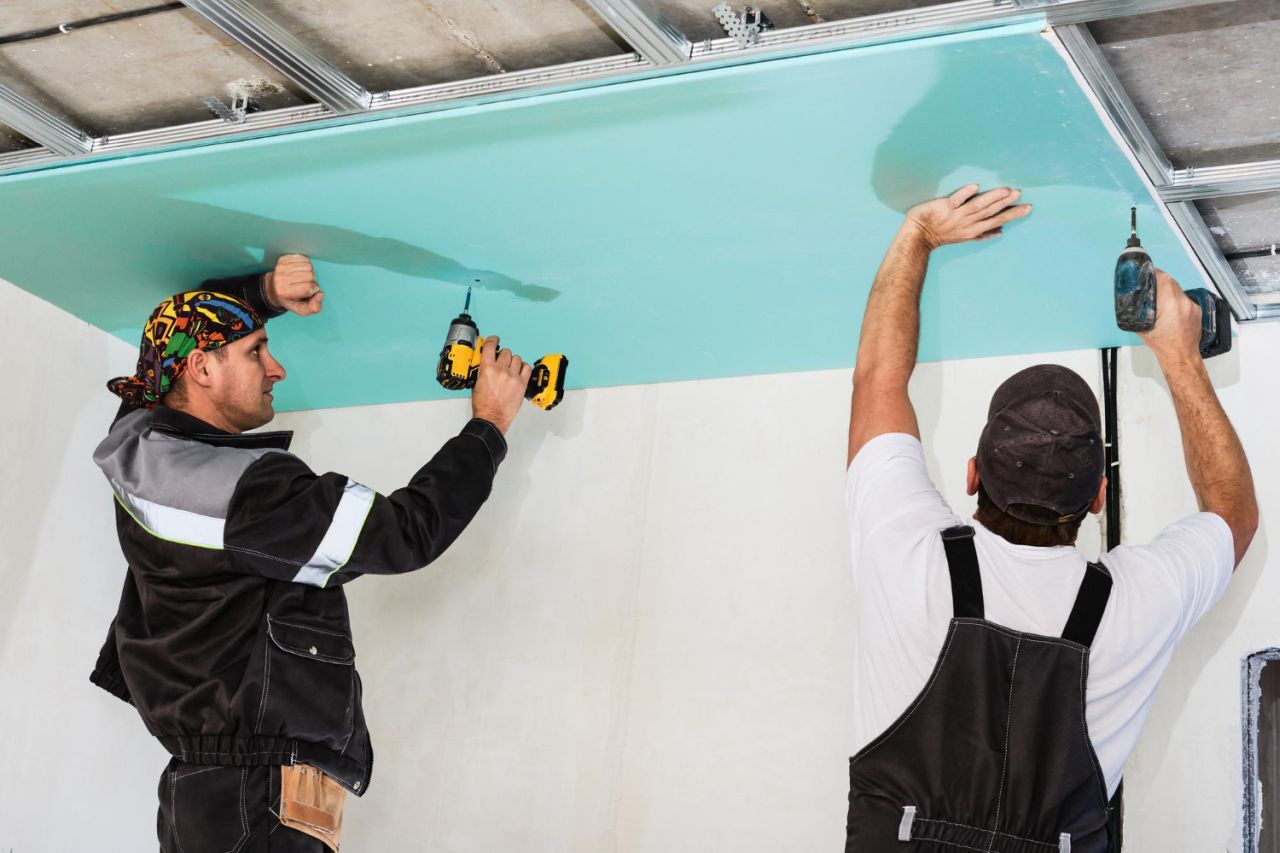
What is Drywall?
Drywall is a uniform panel of gypsum plaster that is squeezed between thick sheets of paper and is known by a variety of other names, including plasterboard, gypsum board, rock, wallboard, and Sheetrock (a trade name).
Drywall has a remarkably extensive history, with the earliest varieties reaching back to the late 19th century.
Although it is not as old as plaster, it has a significant history nonetheless.
Between the years 1910 and 1930, it started its unstoppable advance up home walls and ceilings in the United States.
The drywall comes in a standard size of 4' x 8'. It can have thicknesses ranging from 1/4" to 5/8", making it a very simple material to install across big areas, particularly when compared to plaster.
It is possible to nail or screw it to studs made of wood or metal.
After the joints in the drywall have been coated with joint compound and taped, the drywall is ready to be painted or covered with wallpaper.
Manufacturers produce drywall for a wide variety of applications and environments.
For instance, there are various drywall resistant to fire, moisture, or mould, and rock can be used as a platform for installing tiles.
Because of this, it is now much simpler to adapt drywall with particular qualities to regions where there is a problem with mould or moisture.
Greenboard is a wonderful option for use in a bathroom, particularly one in which the old plaster has long since been removed or in which structural integrity has been damaged due to water damage.
Problems with Plaster
Crack Repair
Foundation settlement, insufficiently sized joists, variations in seasonality and humidity, and improperly carried out repairs are all potential causes of cracks.
Cracks can be as fine as a hairline or as big as a football field.
They may run perpendicular to the wall's surface in a straight line or follow structural components in a diagonal pattern.
Plastering and drywall finishing are two different disciplines, but patching cracks in walls is a talent that lies halfway in between the two.
In other words, a willing starter can undertake simple repairs, and with practice, they can advance to more difficult undertakings.
Hairline Cracks
If a hairline crack has been visible over a period of time and does not move, remove the loose material and fill the crack with a coat or two of joint or spackling compound (or use an elastomeric product like Krack Kote).
If the crack continues to be visible after this process, the problem has been fixed.
Wait for each layer to completely dry before proceeding to the next step: lightly sand the surface.
Sand the patch down to a smooth finish using sandpaper with a fine grain on a sanding block.
Wider Cracks
Tape and the "float" technique should be used for larger fractures or cracks patched in the past without success.
First, apply significant force on either side of the fracture to ensure that the plaster is not shifting in any direction.
The next step is to examine the crack and determine whether one side of it has a higher relief than the other.
Map Cracking or Extensive Cracks
Cover the walls with sheets of adhesive-backed fibreglass mesh with an elastomeric coating, such as Nu-Wal, according to the directions provided by the manufacturer if you are dealing with a vast network of cracks or cracks in random patterns known as map cracking.
Once the product is in place, there may still be some follow-up taping and filling that needs to be done.
Moving Cracks
Dig out the crack on the high or loose side of the plaster using a utility knife or a crack opener, which is a small hand tool.
This should be done if the plaster moves or if one side of the crack is obviously higher in relief than the other.
Take out a sufficient amount of material to get to the good plaster.
Remember that plaster will continue to shift even after it has dried.
Even if filling any fracture using a joint compound is not difficult, more cracks will appear near the repaired crack if the surrounding area is not made stable and separated from any other trouble spots.
Before filling in the crack, most expert plasterers recommend first securing the side of the crack that is loose or high using plaster washers, wafer-thin perforated discs (see below), and drywall screws.
These items are designed to refasten plaster to lath.
To begin, drill a few pilot holes at a distance of at least two inches away from each side of the fissure.
After that, secure the washers using screws that are 2 inches long.
Anatomy of a Plaster Surface
Plaster can be put directly to brick walls, but most commonly, it is applied over a layer of wood lath, which consists of rough-sawn strips two inches long that are attached using the sharpest nails in the world.
To install the lath, nails are driven perpendicularly into wood studs or over 1 by lumber that has been secured to the block.
There are three layers that make up a proper plaster coat, and they are the scratch coat, the brown coat, and the skim coat.
In homes considered to be more modest, the brown coat may be skipped entirely or only partially applied, leaving the plaster finish thin and susceptible to damage.
The houses in this condition still have their original wallpaper, which served dual purposes as a decorative element and a binder for the plaster. (I'm not joking when I say that our home's ceilings were covered with wallpaper.)
Brief History
Plaster is typically applied in a wet state, which is why drywall is sometimes referred to as a "dry" wall.
To grossly oversimplify the process, it can be seen as applying progressively finer grades of mortar that were mixed on-site to the surface of the wall.
Plaster was replaced with drywall in the 1940s because of a mix of factors, including the product itself (the drywall was invented in the 1890s), a dearth of labour (due to the War), and a demand for high-speed installation in homes and industries (related, again, to the War effort).
Plaster was used because it was cheaper and easier to install.
The immediate need to house soldiers who were returning from the War in large numbers was another significant factor that contributed to the industry's decision to never switch back to plaster.
This is in addition to the fact that installing plaster requires significantly more labour and is more expensive than installing drywall.
Lead Paint
The first thing you need to know about plaster is that if you disturb the paint on it, you must obey the new lead paint standards that the EPA has implemented.
Lead-safe remodelling practises are required by legislation and are referred to as RRP, which stands for renovation, repair, and painting.
When you discover what lead dust may do to your children, you will want to ensure that you follow the new guidelines that centre around confining lead dust and cleaning it up after disruptive activities such as demolition, sanding, and paint removal.
In addition, you will want to make sure that you keep your kids away from lead dust as much as possible.
In addition, if you hire a remodeler, the law mandates that in order for them to deal with lead paint-coated materials, they must have successfully completed a Lead Safety Certification course.
This is a legal requirement. Okay, let's go on to the exciting part.
Demolition
Getting rid of plaster is often the best option for homes where it has been installed.
When the walls are open, you have the opportunity to upgrade old plumbing and wiring in addition to insulating the space (the cost of pipe and wire is lowest when the walls are open).
This includes removing the plaster and performing the necessary upgrades in a house that is constructed using wood.
If you have a block house, once you have finished closing everything back in, you will have super-deep window sills and outside door jambs, which are fantastic features to have.
Weights and Measures
When you are taking a room down to its studs, you need to give some thought to how much debris will be created and how it will be disposed of.
A room that is 12 feet by 12 feet and 8 feet tall will produce around 3,000 pounds of debris.
That would easily fill a utility trailer 10 feet long and 5 feet broad capacity.
To put it another way, if you were to place everything into garbage bags that weighed an average of 60 pounds apiece, you would have 50 bags total. Imagine that arranged neatly on the sidewalk for the garage worker to see.
If you decide to rent a dumpster, which is generally the quickest and easiest option, you need to check that it will fit on your driveway without causing any harm.
That will only sometimes be an available choice.
Pierce and Pry
Plaster demolition is the exact last place you want to use a sledgehammer, despite the fact that one can be seen being utilised on almost every home repair television show.
When it comes to tearing down plaster, I've experimented with a few different methods, and the one that I refer to as "pierce and pry" is by far the quickest.
To begin, take off all of the mouldings.
Next, penetrate the plaster with a pry bar of some kind in order to gain access to the space behind the lath.
After that, pull. Plaster has a tendency to crumble, but pulling is the most effective motion for freeing lath nails from the wood.
In spite of what the images may show, it is important to always protect yourself by donning a hat, a shirt with long sleeves, boots, pants, eye protection, and a dust mask or respirator.
No matter how well you can puncture and pry, the resulting dust cloud will make breathing difficult.
I need to be able to see clearly, so I use an air cleaner to remove the dust from the air.
Is Clay Plaster Expensive?
Use Clean Equipment
The first piece of advice that I have is to make sure that you clean the equipment as you go along.
Even though this may sound excessive, it is necessary to have clean buckets, tools, and equipment to prevent the plaster from deteriorating and to get a finish that is of higher quality and that will last longer.
It is also suggested since dried plaster is a nuisance to remove off tools and can produce drags in the plaster finish on the next job if it still needs to be removed.
Clean Water Is Recommended
It is recommended that clean water be used in order to avoid contamination, which may cause it to go bad or set too fast.
This is because contamination could cause it to go bad or set too quickly.
Making a Lump-Free Mixture
When combined with a paddle mixer, a whisk, and a bucket, the plaster should be added to the water before the bucket is stirred; this should be done in a different order.
Making a Lump-Free Mixture
The mixture should be made by first adding just enough plaster to build a mound on top of the water and then mixing it with the paddle mixer so that there are no lumps in the final product.
After you have finished, you can use a wooden stick or a mixer drill to incorporate the plaster to achieve the desired consistency.
Creating the Right Quality Mix
Plaster and water are combined in a proportion that is approximately equal to fifty per cent each.
In other words, you should manufacture a whole bucket of plaster using only a half bucket of water.
The viscosity of the plaster should be similar to that of melting ice cream; to test whether it is properly mixed, place a stick vertically in the bucket of plaster; if it is able to maintain its position, the plaster is ready to be used.
When to Apply the Plaster
When applying the plaster, it should have a sticky texture; moreover, it should be smooth because this will aid the surface to adhere to the wall.
Room Temperature
While plastering is being done, keeping the room at a comfortable temperature is necessary.
Turning off the radiators is necessary because the plaster may dry out too rapidly.
Because of this, it could be difficult to apply and might crack.
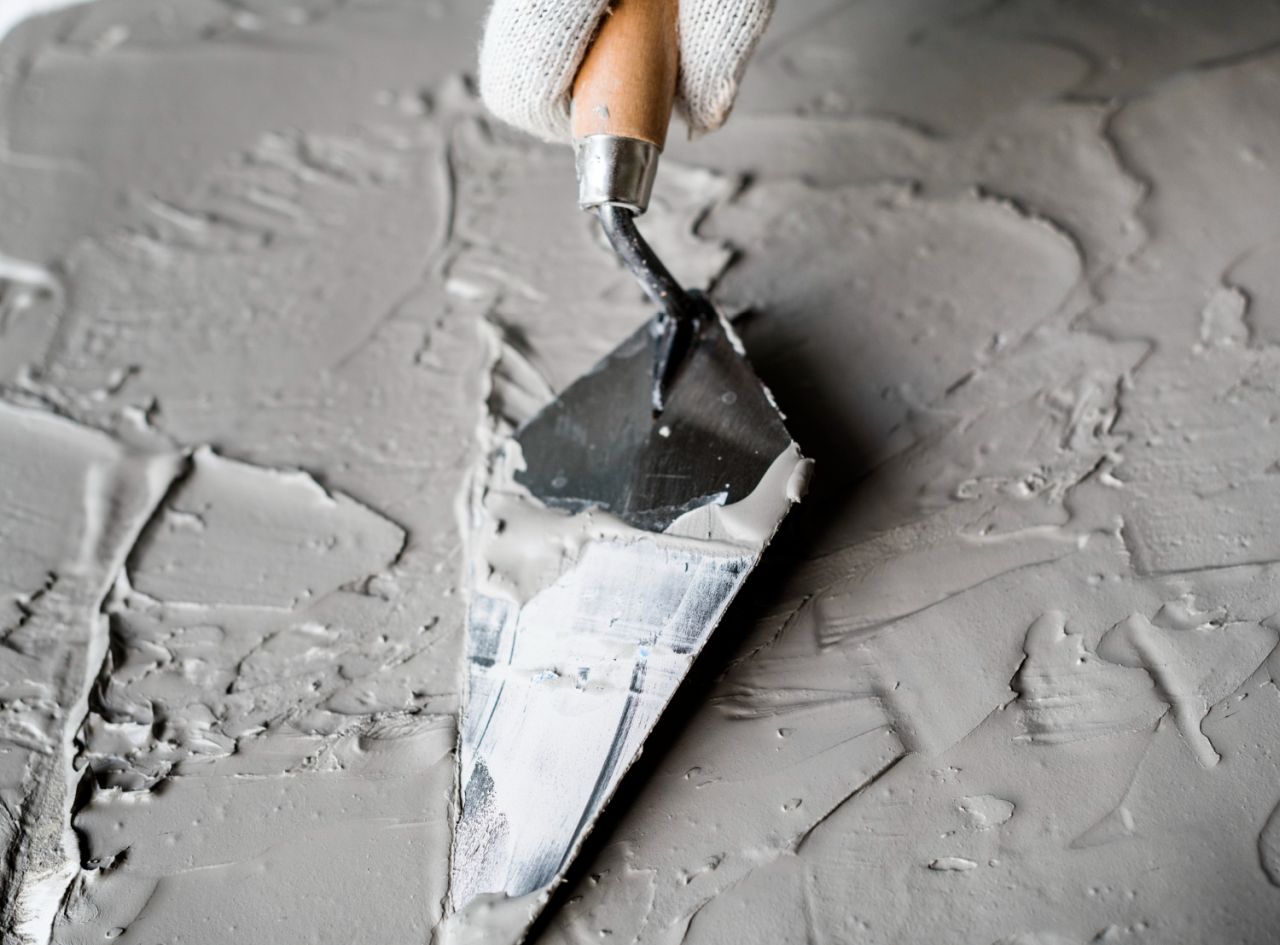
Applying a Good Plaster Finish
A high-quality plaster finish can be accomplished by applying a confident, firm pressure while also ensuring that the trowel is held at the appropriate angle.
Don't worry about trying to perfect the surface with the first coat of plaster because this can take a long time and cause the plaster to dry out before it's finished.
In the subsequent stages, if there are any defects, they will be able to be smoothed out.
Using a Trowel on the Plaster
When applying the trowel to the ceiling or wall for the first time, begin by angling one edge of the trowel away from the surface you are working on.
As you move the trowel, the amount of plaster on it will gradually decrease, resulting in a lower angle between the trowel and the surface.
When the angle of the trowel changes, you need to be careful not to have any leakage.
Where to Stand
When working on the ceiling, make sure you avoid standing directly under the trowel.
Plaster might get into the person's eye if they do this, which is a potential safety risk.
It is best to wait before entering the margins between the ceiling and the wall, as this can help prevent lumps of plaster from forming in the corners of the room.
Ensure the Thickness Is Consistent
In order to have a consistent look across the project, the thickness of the first and second coats should be the same.
By applying sustained pressure, you can ensure that there are no bulges on the surface.
Watch for the Plaster Darkening in Colour
After the first two coats have been applied, the process of "troweling up" can start. Now is the ideal time to smooth out the surface by filling in all of the holes, erasing the trowel marks, and making it uniform.
Check to see if the plaster is sticky and flexible enough to be pushed into the holes but not so wet that it creates further holes in the surface.
Watch for the Plaster Darkening in Colour
The colour of the plaster will begin to darken, indicating that it is ready to be troweled with the finishing trowel.
When you get to the final dry trowel stage, make sure not to polish the plaster too much.
It should be smooth and even, with a light polish, but have the texture of an eggshell.
If it is even smoother than that, it will be difficult for paint and wallpaper to adhere to it.
Choose the Right Plastering Tools and Know-How
Make certain that you have all of the necessary tools and equipment for plastering on hand before beginning the work.
Know-how is another crucial component.
It is possible that the task may be disrupted, which will have a negative impact on the final product if it is not completed.
Supporting Equipment
The use of supporting equipment enables you to access difficult-to-reach regions in a comfortable manner.
Ensure that you have access to equipment such as stilts, scaffolding, or anything else that could be used for the project.
Look After the Trowel
The trowel is an essential instrument for each plasterer to have in their toolset.
Make certain that it is spotless, free of corrosion, and the appropriate kind.
Get in touch with our staff so that we can assist you in selecting the plastering trowel that will best meet your requirements.
Choosing the Right Size
It is recommended that novices select a finishing trowel that is 11 inches in length.
Trowels of a bigger size can cover more ground in less time and may be better suited for use by professionals; nevertheless, larger trowels are more difficult to manipulate.
Is Clay Plaster Expensive?
After being used for a while, a trowel becomes much more manageable and user-friendly.
This not only gives you the opportunity to become familiar with your trowel, but it also makes it simpler to maintain control of the tool and ensures a more polished end result.
Do Not Sand Down Plaster
Sanding down plaster may do more harm than good.
If the steps for plastering are carried out in the correct order, there should be no need to make use of sanding materials.
In the end, it may generate a greater mess, more defects, and further laborious effort.
How to Finish Plaster
Plaster holes can be filled by either applying firm pressure or placing additional plaster in the hole, after which the surface should be smoothed out.
Any trowel marks or ridges in the plaster can be properly smoothed out once the plaster has reached its hard stage.
This assumes that it has been kept flat and that the trowel can sit flush against the wall.
Prepare & Control the Suction
Take Control of the Suction If the wall is too dry, moisture will be sucked out of the plaster that you apply, and it will become too solid to operate well.
However, if the wall is damp, the plaster will absorb the moisture and work effectively.
This is relevant information for both the backing coat and the skim coat.
Using a Sand Based Backing Coat
Sand and cement (with plasticiser) can offer the beginner several benefits, including the following:
- allows you the entire day to work with it, and since it sets overnight, there is no rush to get things done.
- is simpler to float, which means that even if the marking off with the straight edge still leaves holes or the surface is uneven, the float will take care of the problem.
Apply Two Coats
A first coat that is extremely thin, with the only purpose of ensuring that it adheres and is properly driven into the wall with a great deal of pressure.
This ensures that it will not slide off later and enables the application of the second coat, with just the right amount of pressure to ensure that the correct thickness is applied and to maintain it somewhat flat. (If you have to exert a lot of force to get the plaster to attach to the wall, it is easier to concentrate on these other factors).
When applying the second thin layer, ensure the first thin coat is still moist and malleable.
If you do this, you might be surprised to find that you only need to use a small amount of pressure.
Just apply the first coat slightly ahead of the second, or make sure the suction is controlled so that it does not dry too rapidly.
A second layer can be placed with as much pressure as necessary to maintain the surface flat, but it can be as thick as necessary.
Keep it Flat
Always check to see that you are going for flatness rather than smoothness in your work.
We all have a tendency to fiddle with the backing coat in an effort to make it more smooth, but in reality, it doesn't matter how smooth it is; all that matters is that it is flat, as the skim coat will do a far better job of smoothing the surface than the backing coat will.
If the backing coat is perfectly flat, it will be easier to achieve a finish that is smooth.
Corners
If you do nothing else, ensuring all corners are completely flat will make the wall look much better overall.
Internal angles and corners When a straight edge is held up vertically, the corner on the right and the corner on the left should be completely flat.
When a straight edge is held in a horizontal position, both the top and bottom should be flat.
External corners ensure that all angle beads are straight and align properly with the walls or frames surrounding them.
Cut back
Extremely uncomplicated to carry out and enables a quick inspection of everything.
Simply pass a completely flat trowel over a wall that has become solid at the end of the day or before applying the finish coat. (you should never attempt this when the plaster is still soft).
Make sure the corner of your trowel runs right to all the edges, and trim off any minor bulges of plaster straight into the corner by slightly cutting into the neighbouring wall or ceiling with the blade of your trowel.
This will ensure that the corner of your trowel runs right to all the edges.
Trowel Angle
One of the most essential pieces of advice regarding plastering is...
When paired with steady pressure, a 10 mm flattening on the leading edge will occur.
When this angle is increased more than 10 millimetres from the wall, the trowel will scrape away at the plaster.
It is not a smart idea if you just want to patch a few holes since you run the danger of scraping the plaster down to its lowest level, which increases the likelihood that the backing coat will become visible.
Only helpful if you have any protrusions or places that are naturally thicker that need to be flattened.
Flatness, Holes, then Trowel Marks
If you remember this order, everything should work out fine.
Make sure that your trowel is constantly sitting flat on the wall, and then, before the plaster has a chance to harden too much, plug any holes in the surface either by pressing firmly on the area or by adding more plaster to the area and then smoothing it out.
If you have maintained the flatness of the surface and allowed your trowel to lay flat on the wall, any trowel marks or ridges will be successfully smoothed out when the plaster has reached the desired level of firmness.
Conclusion
Plaster walls are a traditional wall finish that has been used for centuries, made by applying multiple layers of plaster over a wooden or metal lath structure.
A drywall is a uniform panel of gypsum plaster pressed between thick sheets of paper.
Patching cracked walls is a skill between plastering and drywall finishing and can range from hairline size to very wide.
For hairline cracks, use joint or spackling compound, tape and “float” technique, map cracking or extensive cracks, and moving cracks. Professional plasterers recommend securing cracks with plaster washers, perforated discs, and drywall screws.
Plaster is applied over wood lath and requires a scratch coat, brown coat, and skim coat. Lead paint regulations are the law. Demolition of plaster is the best way to insulate and update old plumbing and wiring, but weighs and measures must be taken into account.
The fastest way is "pierce and pry" with a pry bar and eye protection.
The most important details in this text are the steps involved in plastering a ceiling or wall.
The first tip is to clean the equipment as you go along, use clean water, make a lump-free mix, apply a good plaster finish, choose the right plastering tools and equipment, look after the trowel, do not sand down plaster, fill any holes in plaster, prepare and control the suction, apply two coats of plaster, and use an air cleaner to pull the dust out of the air.
The second tip is to use an air cleaner to pull the dust out of the air.
The third tip is to use an air cleaner to pull the dust out of the air.
Finally, the fourth tip is to use an air cleaner to pull the dust out of the air.
Content Summary
- Tips and Tricks for Working with Plaster Walls Are you looking to tackle a home improvement project that involves working with plaster walls?
- Plaster walls can add a touch of elegance and charm to any space, but they require a special approach when it comes to repairs and renovations.
- In this comprehensive guide, we will share some valuable tips and tricks to help you navigate the world of plaster walls and achieve outstanding results.
- Before we delve into the tips and tricks, let's first understand what plaster walls are.
- What is Plaster?
- What is Drywall?
- This makes it easier to tailor drywall with specific characteristics to areas where moisture or mould is a problem.
- Problems with Plaster Crack Repair Cracks can be caused by foundation settlement, undersized joists, seasonal and humidity changes, and poorly executed repairs.
- Patching cracked walls is a skill that falls somewhere between the trades of plastering and drywall finishing.
- First, press hard on either side of the crack to make sure that the plaster isn't moving.
- Remove enough material to reach good plaster.
- Most professional plasterers recommend securing the loose or high side of the crack with plaster washers, wafer-thin perforated discs (see below) that refasten plaster to the lath, and drywall screws before filling in the crack.
- Brief History: drywall is called "dry" because plaster is applied wet.
- The reason for the switch from plaster to drywall in the 1940s was a combination of the product itself (drywall was invented in the 1890s), a lack of labour (due to the War), and a demand for high-speed installation in homes and factories, again due to the War effort.
- Lead Paint: The first thing to know about plaster is that you must follow the EPA's new lead paint regulations when you disturb the paint on it.
- Called RRP for Renovation, Repair and Painting, lead-safe remodelling practices are the law.
- And, when you find out what lead dust can do to your kids, you'll want to make sure you follow the new rules that centre around containing and cleaning lead dust from disruptive activities like demolition, sanding, and paint removal.
- Demolition For many homes, the best thing to do with plaster is to remove it.
- For a wood-framed house, this means dropping the plaster and making the upgrades.
- Weights and Measures If you're blowing a room back to the studs, think about how much debris you'll generate and how to dispose of it.
- A 12-by-12-foot by 8-foot tall room will generate about 3,000 pounds of debris.
- Pierce and Pry Despite seeing one used on virtually every home-improvement television show, plaster demolition is the last place you want to use a sledgehammer.
- Next, use a pry bar of some type to pierce the plaster and get in behind the lath.
- No matter how efficient pierce and pry can be, it is a lung-choking dust storm.
- Is Clay Plaster Expensive?
- Use Clean Equipment The first tip is to clean the equipment as you go along.
- Although this may sound over the top, it is vital to have clean buckets, tools and equipment to ensure that the plaster does not go off and that it gives a better finish that lasts.
- Creating the Right Quality Mix: The plaster and water mix roughly 50:50.
- When to Apply the Plaster The plaster must be applied when it feels tacky but also not too wet, as this helps to bond the surface to the wall.
- Radiators should be turned off, or the plaster will dry out too quickly.
- Applying a Good Plaster Finish A good plaster finish can be achieved with a combination of confident, firm pressure and the correct angle of the trowel.
- Don't try to perfect the surface in the first coat, as it can take time and lead to the plaster drying out before it is done.
Frequently Asked Questions About Plaster Walls
The secret is to remove any loose areas of existing plaster, dust or paper as much as you can before even contemplating plastering.
Next, the surface must be treated with a mixture of PVA glue and water (the exact mixture depends on your type and is covered in our plastering course in some detail).
Plaster can be easily painted with the same techniques as drywall.
Even with a good coat of primer, plaster walls are notoriously thirsty for paint.
Using a roller for open spaces and brushes around trim and borders, spread an even coat of your choice of paint.
Try to cover the wall in a manageable amount of time.
Avoid getting small objects, powders and sprays inside your cast, as they could irritate your skin. do not try to alter the length or position of your cast. only lift something heavy or drive once the cast has been removed. use crutches or a sling as advised by your health professional.
Plastering can be physically demanding work, so a level of physical fitness is important.
It is a very versatile job as many diffrent times of construction from residential to commercial buildings, need plaster, so you will be kept engaged with a diffrent site to work on constantly.
Generally, it will take around 3-5 days for plastering to dry out however, there are a few factors that will affect the drying time of your plaster.
The thickness of the plastering will affect the time it takes for the plaster to dry out.


