
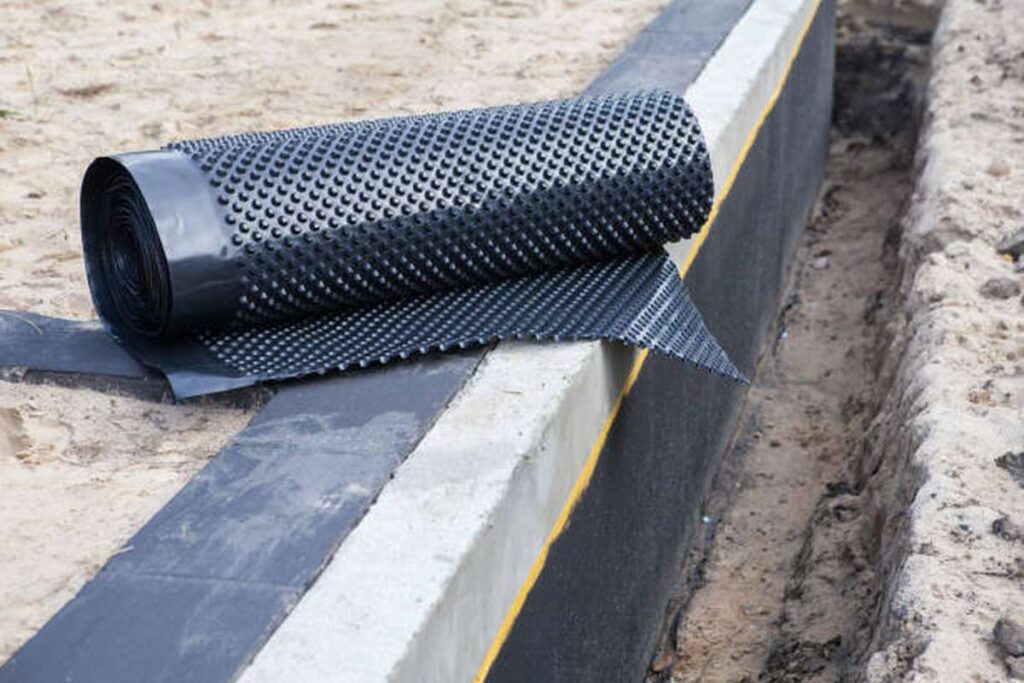
Instead of placing a weeping tile system on the interior of a concrete block foundation, outside waterproofing can be done by excavating the foundation and applying a waterproof membrane. Fixing water seepage through the foundation's walls can be accomplished by doing this. The stages involved in waterproofing a foundation are outlined below, along with the advantages and disadvantages of this practise. The purpose of this method of waterproofing is to stop water from seeping in from the inside. To do this, a drain tile must be laid in the floor and directed towards a collection well. The water is then drained using a sump pump.
To create weep holes, holes are drilled into the foundation's lowest row of blocks. Water can escape through these openings and enter the municipal sewer system instead of pooling in the basement. This article will help you make a decision about home building construction. Here at MJS Construction Group, we’re committed.
Don't rush the waterproofing process; give it plenty of time to settle. If you need the services of a waterproofing subcontractor, remember that a skilled professional may be in high demand during the peak of the construction season. If you're going to use one, bear this in mind. Water also slows down the waterproofing process.
Don't rush through the waterproofing layout; give yourself plenty of time to do it. The finish grade line on the foundation walls should probably be shown on the plan elevations, but this should be checked with the architect just to be safe. The thick, black waterproofing should not be seen above ground. Keep an eye out for grade level changes. A diagonal line of waterproofing from one level to another won't function if the architect intends to use a retaining wall to manage the elevation difference.
Marking the layout lines with a crayon or a chalk line is preferable, especially if the foundation is intricate and has variable grades. A simple foundation may allow the waterproofer to be instructed to work a set number of inches from the roof. Waterproofing should ideally be applied within a few inches of the final grade but no more than six inches below the surface.
If there are form-tie holes below the surface, these must be sealed. You should plan ahead for how you'll deal with basement windows and bulkheads, porch foundations, and intersecting walls that don't need to be waterproofed.
If you're trying to decide which walls need to be waterproofed, here's a rough rule of thumb to go by: If a wall in the basement or crawl space faces the soil on one side and a liveable area on the other, it must be waterproofed. To avoid water damage, the waterproofing should extend outward by at least 12 inches onto non-waterproofed intersecting walls.
It's likely that you'll need to finish waterproofing the other walls as well if the area is extremely wet. It has been noted that under extreme situations water can seep through the keyway, along the footing, and into the inhabited space. Talk to the architect if you have any problems or queries.
Before using, make sure the waterproofing meets the manufacturer's temperature requirements. Applying waterproofing on a cold day probably won't be a problem if you are using a solvent-based compound. If the material you're working with contains water, though, proceed with caution. Some items can't be stored below 40 degrees Fahrenheit.
Concrete Block Foundation Waterproofing
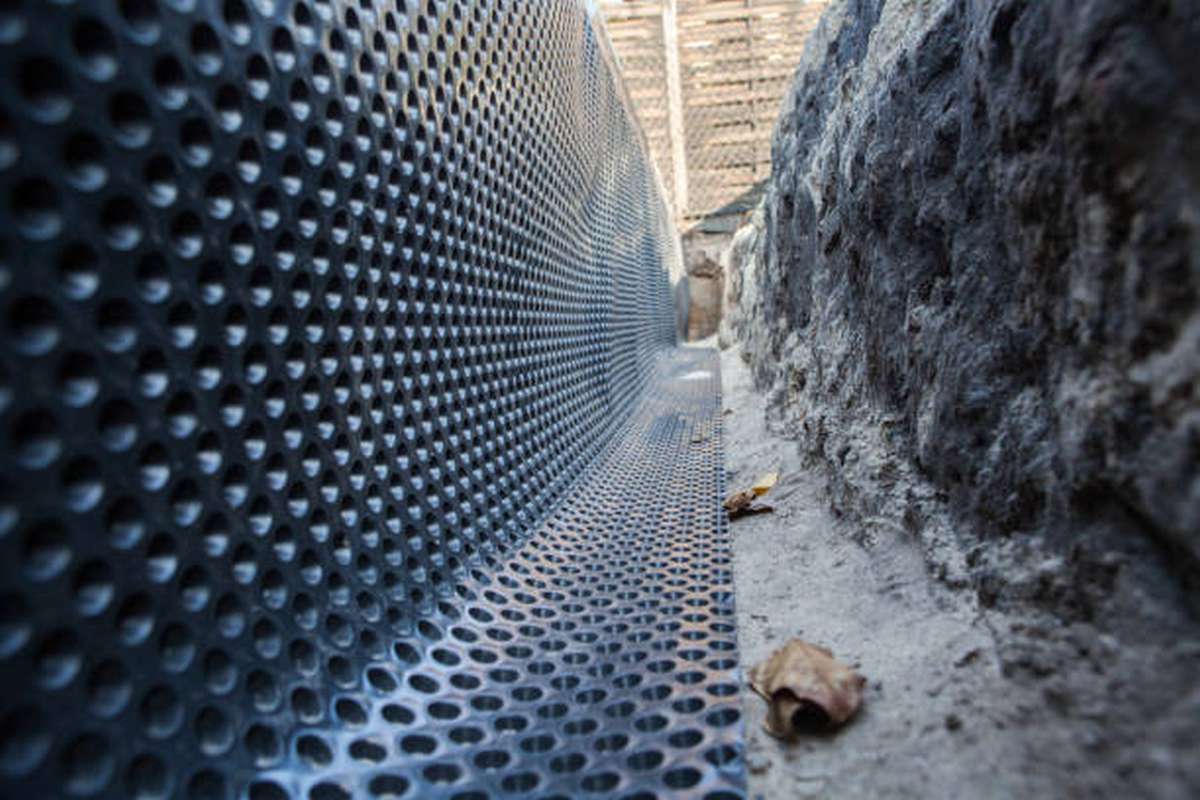
For many people living in homes constructed between 1920 and 1980, the aggravating reality of a leaky concrete block or cinder block foundation is a daily reality. On this page, we'll go over the common causes of leaks in block foundation walls and the techniques used to fix them.
Can You Tell If Your Block Foundation Leaks
It is easy to tell if a foundation is leaking by looking for stains on the concrete blocks.
That is an undeniable truth that can't be ignored. It is clear evidence that your concrete block or cinder block walls are either retaining water within the blocks themselves or allowing moisture to permeate through them if their appearance is similar to the examples shown above.
If your basement walls appear like the ones in the pictures, water is leaking in at least occasionally. Dampness and water seepage beneath the basement floor slab are the results of moisture wicking through the blocks and into the air in your basement. Your foundation's walls will decay prematurely due to these variables even if conditions are good. Building on a waterproof foundation is your only option.
Concrete Block / Cinder Block Foundations Leak
An inherent fragility of block foundation walls is caused by its design defect, the presence of mortar joints on both sides of the blocks (the same as any brick wall). As time passes, mortar joints tend to develop fine cracks. When soil moisture levels fluctuate, clay soils, in particular, expand and contract, causing the ground to buckle and crack. With more water in the soil comes a greater force that is exerted on the broken mortar joints.
Notably, if the footing supporting the foundation's base sinks, the settlement will cause the mortar joints and blocks to crack. It is simpler for water to penetrate what are basically hollow blocks due to cracks in the blocks and mortar joints below grade, as well as cracks in the blocks themselves, which are constantly subjected to hydrostatic pressure from the water table that surrounds the foundation.
Inject Leaking Concrete Block Walls
We have been getting many requests to inject block walls as more and more homeowners learn that pressurised injection with materials like epoxy and polyurethane is a highly effective way to waterproof a dripping basement.
Pressurized injection is not a good method for waterproofing concrete block foundations due to the hollow nature of concrete blocks. Pressurized injection is not an effective approach for waterproofing concrete block foundations because the injected resins cannot be contained in the area(s) where water is penetrating the foundation.
Applying Interior Sealants On Leaking Concrete Block Walls Work
You may have heard that adding a waterproof sealer or tar-based substance to the inside of a concrete block or cinder block wall will prevent water from seeping in and cure your leaking basement. This, however, is not the situation. Considering a new project? Then MJS Construction Group builders Melbourne is the answer.
Waterproofing a basement by sealing the inside of a foundation wall made of concrete blocks may stop a leak in the basement in the short term, but this method effectively prevents any evaporation of the moisture that is trapped inside the blocks.
Placing a cinder block wall at a low area where water can pool (be entrapped) can eventually lead to the wall's collapse due to the porous nature of concrete. Over time, this could cause your repair bills to skyrocket, and it could even compromise the stability of your foundation walls. Surface sealants must be placed to the outer foundation wall surface to ensure the foundation is waterproofed.
There Are Only Two Professional Concrete Block Basement Waterproofing Methods Available.
In order to prevent water from damaging a block foundation or penetrating it, it makes sense to divert water away from the base of the structure.
The foundation wall is excavated and then coated to prevent water seepage. Installing an interior weeping tile/perimeter drainage system is another option for waterproofing a basement when disruptive excavation is not desired or when resources are limited.
Either of these methods for basement waterproofing will considerably reduce the rate of degradation of your foundation.
We have seen several situations when the foundation walls required to be restored or reinforced to prevent foundation failure throughout the course of our work (often the result of years of neglect of a known problem). If at all possible, you should take preventative measures, and waterproofing the block foundation is an excellent place to begin. Rebuilding or reinforcing a wall is an expensive proposition, so it's best to avoid it if at all feasible.
Select The Most Appropriate Repair Method For Your Leaking Block Foundation Walls
Blocks of concrete or cinder can be used to permanently patch leaks in masonry walls. Waterproofing from the outside, or by installing a weeping tile system on the inside, may be the best option depending on a few factors. The following factors must be thought about:
Whether or not the basement has been completed;
- Visible mould growth inside the home;
- How much moisture was found beneath the basement's finished walls (a high amount implies the presence of mould);
- The exterior and, if possible, interior condition of the concrete masonry units;
- The convenience of getting to places where waterproofing is inadequate;
- If a high water table is to blame for the pooling water in your basement, or not;
- The extent of the home's surrounding landscaping (the presence of concrete walks, decks, and fencing, etc.);
- Your openness to ripping out the basement's finished walls or mowing down the lawn in front of the house;
- How worried you are that mould may be lurking behind your basement's finished walls;
- How much money you have set aside to waterproof your basement;
- You can be a realist or an idealist;
- If the wall has to be fortified with more bricks or not;
- The efficacy of the city's preexisting stormwater drainage infrastructure and the state of its weeping tile;
- The level of basement waterproofing required; and
- Whoever it is that you hire to do the waterproofing.
As was previously indicated, there are only two expert procedures that may be utilised to fix the absence of waterproofing in a concrete block foundation.
History Of Concrete Block
Concrete has been used extensively in building structures from prehistoric times. It's made from cement, aggregate, and water. Poured concrete foundations, formed on-site through casting, are the norm in the Chicagoland area. Concrete block is built from concrete that has been shaped and dried in a factory, away from the construction site.
It's no secret that the Midwest is a veritable treasure trove of aggregate materials like sand, gravel, and various forms of crushed stone. In order to make concrete blocks, these are the most essential ingredients. In common parlance, "cinder block" is often used as a synonym for "concrete block." It cannot be overstated that there are discernible differences. Cinder block is often lighter because ashes from coal combustion are utilised as the aggregate rather than heavy sand or pebbles.
More and more houses were built in the early 20th century out of concrete blocks thanks to mass production methods. In comparison to traditional building materials like stone and brick, they were far more convenient to store and transport, leading to their meteoric rise in popularity. The fact that they could withstand fire and water was also touted. Proof that it is fireproof is the fact that it survived the Great Chicago Fire. Later in this essay, though, we'll talk about whether or not it's actually weatherproof.
The foundations of buildings, both above and below ground, can be built using blocks. Split-faced block is a phrase used to describe a type of building material that is installed above ground level. For the most part, foundations are laid with concrete blocks that measure 16 inches by 8 inches by 8 inches and weigh around 40 pounds apiece. Stones are stacked and held together with mortar by masons.
Problems With Concrete Block Foundations
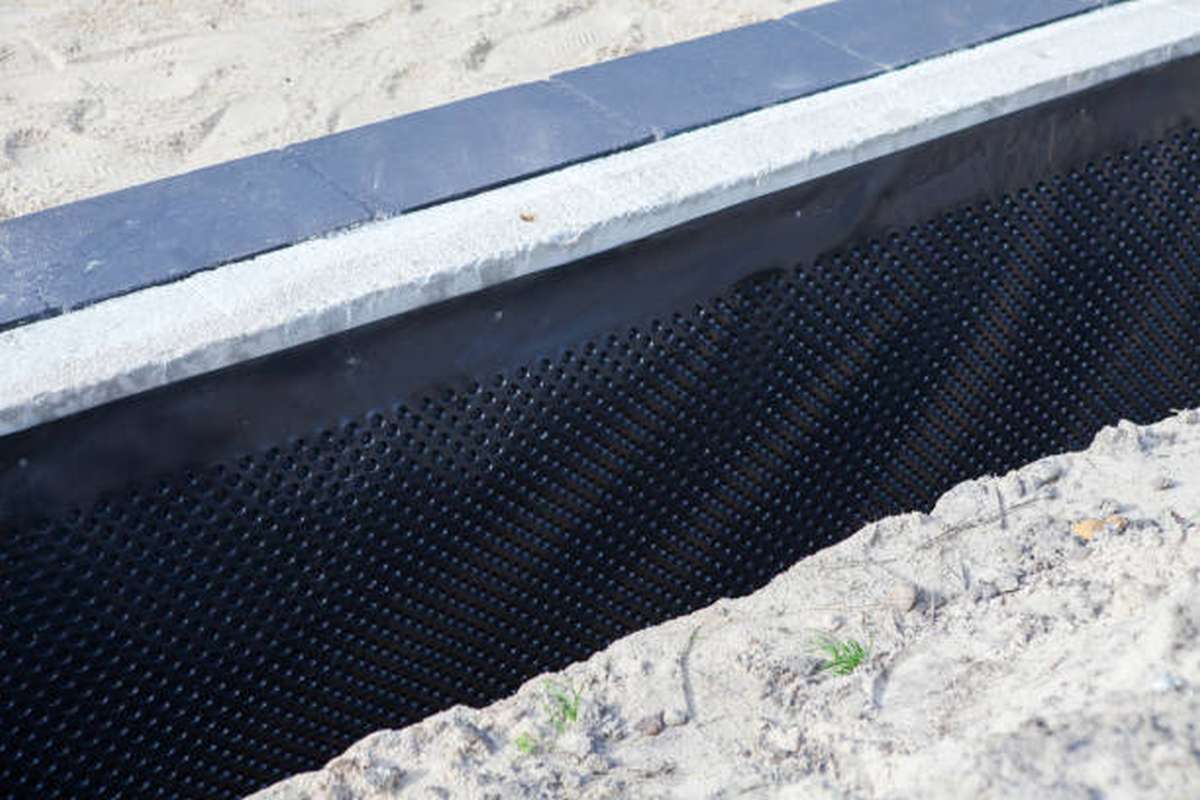
Over time, the foundation's mortar deteriorates and wears away due to the combined effects of pressure from the soil and water. This directly contributes to water seeping through the external mortar joints and into the block's interior cavities. When water accumulates inside a block and has nowhere to go, it begins to seep through the foundation. Remember that concrete blocks have a cellular structure that allows water to permeate them. It absorbs water quite well, which might lead to mould growth issues.
There are times when the combined weight of the dirt and water is so considerable that the wall buckles inward. The structural issues with this movement will be discussed at a later time, but in the meanwhile, we have a solution.
Alright, it seems like we have a hollow-block issue and a basement-water issue. So, how does one proceed? Certainly not a challenging task. Either we seal off the exterior to prevent water from seeping in (external waterproofing), or we let it in from the inside (Interior Waterproofing).
With a foundation made of concrete blocks, a house may rest assured that it has one of the most solid underpinnings available. In contrast, it is weak against the pressure of the earth and water around it. In time, the mortar used to link the foundation's blocks would wear away due to the intense pressure exerted upon its walls. The elevated pressure is responsible for this effect. As a result, water can find its way into the crevices and eventually create seepage.
Pores are a characteristic of concrete as a material. In this way, it can gradually absorb water. In the long run, this could lead to an issue with mould or mildew.
A concrete block wall may lean inward if the soil and water pressure are significant enough. A landslide is the name for this kind of natural disaster. It's possible that the wall will collapse if this problem isn't remedied soon.
It is crucial to give proper waterproofing of a concrete block foundation your full attention while it is being built. If you are having issues with the waterproofing of your home's foundation, there are several options for fixing the problem. See our list of available builder services melbourne to help you make an informed decision for your treatment.
Approach with a Smile. This necessitates a strategy for waterproofing the foundation that involves beginning on the exterior of the walls. With this plan, you won't have to wreck the inside of your home very much at all. However, the cost is higher due to the time and effort involved in its production.
The extent of the damage found will dictate the methods used to repair it. Contractors typically start by excavating the area around the foundation before sealing it off with a waterproof membrane. The following phase is to lay down drain tiles, whose principal purpose is to collect and channel water away from the building's base.
Concrete Block Waterproofing Solutions
Exterior Waterproofing:
Many individuals believe that the best way to solve a problem is to approach it from a different angle, or the "positive side."
There is unanimity among us when it comes to supporting this action when it is necessary and acceptable to do so. The price is a major negative. Labor costs will rise as you dig deeper and deeper to reach the footing for your foundation wall.
Waterproof membranes are put to the foundation walls once excavation is complete to prevent water seepage. In order to collect and dispose of any surplus water, a drain tile is set up.
In the event that there are obstructions, like a driveway, porch, or garage, they will need to be removed and then replaced. The price tag for this project has got a whole lot bigger.
Interior Waterproofing:
There is another line of thought when it comes to the issue of water resistance in concrete block foundations. Instead of trying to prevent water from coming from the "positive side," it may be viable to channel it into an internal drainage system beneath the floor.
The term "Interior Drain Tile" is used to describe this technique. Drilling holes into the bottom row of blocks is required to finish the installation.
These weep holes allow water to escape the crannies and enter the drain tile system below. Interior Drain Tile Systems can be installed in both unfinished and finished basements, though the latter will require more prep work.
This is the first of several reasons why you should prevent moisture from entering the base. And then there's the minor problem of mould and mildew flourishing in damp, dark places like basements and crawl spaces.
The problem is that standard concrete is not watertight. In most cases, it will be able to prevent liquid water from penetrating even if it is uncracked (though, to be fair, what concrete is uncracked?), although water vapour can easily travel through it. Water must be directed away from concrete foundations and must not permeate the concrete for the building to last.
Therefore, depending on the location, climate, topography, soil/water table conditions, and depth of the foundation, draining any water away and ensuring a dry interior area below grade can be either quite simple or fairly difficult. The subterranean areas of your home will be kept dry as one of our main priorities. These three parts are essential to any system designed to prevent water seepage. Here they are, starting at the bottom:
- Water is diverted away from the foundation's footings via drains.
- Assisting water to run off of walls and into drains is the goal of this wall treatment.
- Surface-level treatment near to the building to redirect surface water away from it.
Also, remember that once the structure is built, most of this will be hidden below, so doing it correctly the first time is crucial because fixing it would be difficult and expensive. MJS Construction Group employs only the best townhouse builders to ensure that your new residence is exactly what you envisioned it to be.
When the foundation of a home springs a leak, it can ruin more than just the walls and flooring. Water damage in a business setting may be devastating to costly machinery and crucial operations. When this happens, businesses experience financial losses, customer dissatisfaction, and even potential legal repercussions.
Conclusion
Waterproofing a foundation prevents water from seeping through the inside of a building. Weep holes are created by drilling through the bottom course of a masonry foundation. Instead of collecting in the basement, water can flow out through the drains and into the city's sewage system. When one side of a wall is exposed to earth and the other is to a habitable space, the wall must be waterproofed. At least 12 inches of waterproofing should extend beyond the waterproofed area, onto the unwaterproofed, intersecting walls.
Leaks in block foundation walls: typical causes and common methods of repair. The mortar joints included in block foundation walls are a design flaw that contributes to the structures' inherent instability. To make sure the foundation is watertight, surface sealants must be applied to the exterior foundation walls. A temporary solution to a leaking basement might be to caulk the inside of a foundation wall composed of concrete blocks. It makes sense to direct water away from the base of a building to keep it from eroding the block foundation or seeping inside.
Depending on a number of conditions, exterior waterproofing may be preferable than interior weeping tile installation. Blocks can be used to construct both the surface and subsurface portions of a building's foundation. To create concrete blocks, the material is formed and dried in a factory. Above-ground split-faced block construction is referred to as "split-faced block." If the soil and water pressure are great enough, a wall made of concrete blocks may slant inward.
If this isn't fixed, the wall might fall. Foundation waterproofing problems can be fixed in a variety of ways. After the foundation has been excavated, waterproof membranes are applied to the walls to prevent water seepage. You can set up an interior drain tile system in either a raw or completed basement. When holes are drilled, water can flow out of the crevices and into the drain tile system below.
When a home's foundation develops a leak, it can cause damage to more than the structure itself. Because of this, MJS Construction Group only hires the most qualified townhouse builders to make sure your finished home is everything you imagined it to be. In a commercial context, water damage may be disastrous for expensive equipment and essential processes.
Content Summary
- Instead of placing a weeping tile system on the interior of a concrete block foundation, outside waterproofing can be done by excavating the foundation and applying a waterproof membrane.
- The stages involved in waterproofing a foundation are outlined below, along with the advantages and disadvantages of this practise.
- On this page, we'll go over the common causes of leaks in block foundation walls and the techniques used to fix them.
- Building on a waterproof foundation is your only option.
- As was previously indicated, there are only two expert procedures that may be utilised to fix the absence of waterproofing in a concrete block foundation.
- If you are having issues with the waterproofing of your home's foundation, there are several options for fixing the problem.
- This necessitates a strategy for waterproofing the foundation that involves beginning on the exterior of the walls.
- In order to collect and dispose of any surplus water, a drain tile is set up.
- There is another line of thought when it comes to the issue of water resistance in concrete block foundations.
- Instead of trying to prevent water from coming from the "positive side," it may be viable to channel it into an internal drainage system beneath the floor.
- These weep holes allow water to escape the crannies and enter the drain tile system below.
- The problem is that standard concrete is not watertight.
- Water must be directed away from concrete foundations and must not permeate the concrete for the building to last.
- Therefore, depending on the location, climate, topography, soil/water table conditions, and depth of the foundation, draining any water away and ensuring a dry interior area below grade can be either quite simple or fairly difficult.
- The subterranean areas of your home will be kept dry as one of our main priorities.
- These three parts are essential to any system designed to prevent water seepage.
- Surface-level treatment near to the building to redirect surface water away from it.
- When the foundation of a home springs a leak, it can ruin more than just the walls and flooring.
FAQs About Waterproofing
In order to calculate these dimensions into metres measure everything in metres or if you prefer centimetres, multiply the depth, width and length measures by 100. Using this simple concrete calculator will help you measure the concrete volume and the concrete needed.
In Australia, concrete slabs must be fixed in adherence with the Australian Standards AS 2870 and AS 3600. The most common slab thickness in Australia is between 85mm and 100 mm. The thickness of concrete slabs is usually stated in specification documents.
The concrete curing process involves a reaction between Portland cement and water helping on releasing heat from the concrete at a desired and controlled rate. Without curing, moisture is lost too quickly and there isn't enough water necessary for the crystals to grow, resulting in weaker concrete.
Concrete continues to gain strength after pouring for as long as it retains moisture, but the longer it moist-cures, the slower the rate of strength gain. Moist-curing concrete for 20 days more than doubles its strength compared to four days of moist-curing, which is considered a minimum.
There are three basic ways of curing concrete. The first involves keeping the surface of the concrete moist by the use ponding, spraying/sprinkling, damp sand or damp hessian. The second prevents the loss of moisture from the concrete by covering it with polythene sheeting or leaving the formwork in place.



