Plasterboard walls and ceilings are simple to paint in order to inject some colour or create a more customised aesthetic. However, it's worth it to put in the extra work for preparation if you want to get the most out of painting directly onto your surfaces.
Doing so ensures a smooth, long-lasting finish tailored to your preferences and needs.
This blog post shows you how to prepare plasterboard for painting properly and will reveal the benefits of doing so.
We will also offer suggestions for methods to employ and pitfalls to avoid. This guide has everything a do-it-yourselfer or professional contractor needs to make sure their painted plasterboard looks great and lasts a long time.
What Exactly Is A Plasterboard, And How Does It Work?
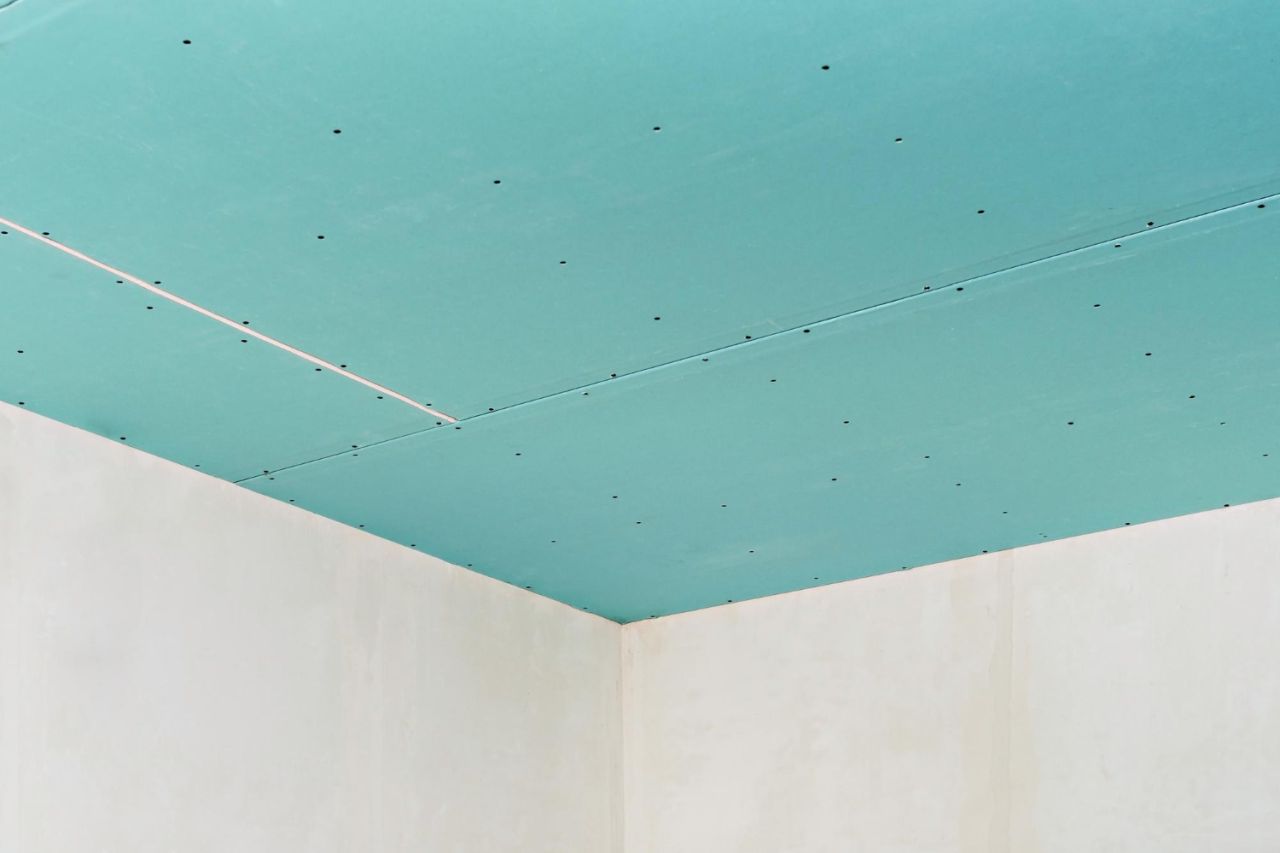
Plasterboard, sometimes known as drywall, is a cheap and flexible construction material. Gypsum board, made up of two layers of heavy paper or fibreglass matting with gypsum plaster in between, is widely used for interior walls and ceilings due to its low price, fire resistance, ease of installation, and adaptability to work around obstacles like wiring and pipes.
It's available in various dimensions and thicknesses to help you locate the most appropriate option for your project.
Plasterboard is adaptable because it can be painted or textured to fit any style. As a result, Plasterboard is an excellent material for any building project, whether it's new construction, renovation, or the addition of unique touches.
Common Types Of Plasterboard
When choosing plasterboard for your home, you have a selection of potential choices from among the many types available. Plasterboard comes in a variety of varieties, some of which are listed below:
1. Standard Plasterboard
Regular or standard plasterboard is the most popular choice for interior and exterior walls in new construction and renovation projects. It consists of a gypsum plaster core encased in a paper or fibreglass exterior.
Plasterboard can be used for many different projects because there is a great variety of dimensions, thicknesses, and edge treatments. Standard plasterboard is typically found in thicknesses between 9.5mm and 12.5mm, but thicker options are available for use in areas requiring increased fire resistance, sound insulation, or impact resistance.
Plasterboard that meets industry standards is simple to set up and can be tailored to a specific size with a knife or saw.
It can be nailed, screwed, or glued to wood or metal studs and then painted, wallpapered, or covered in textured coatings for various looks and textures.
2. Moisture-Resistant Plasterboard
A green board, or moisture-resistant plasterboard, is a special plasterboard to withstand high humidity and moisture. It is typically installed in damp rooms like kitchens, bathrooms, and utility rooms.
Plasterboard with a water-resistant core is constructed with gypsum modified with silicone or wax. A layer of water-resistant paper or fibreglass is used to seal off the core from the outside environment.
Moisture-resistant plasterboard is constructed to prevent the growth of mould and mildew, in addition to its resistance to water damage. This is especially crucial in damp environments, as mould and mildew can lead to health issues and structural damage if not eliminated.
3. Fire-Resistant Plasterboard
Plasterboard built to withstand fire is called fire-resistant plasterboard, fire-rated plasterboard, or Type X plasterboard. Walls, floors, and ceilings that separate various sections of a building are typical places to find because of the importance of fire safety in these locations.
The gypsum core of the fireproof plasterboard is reinforced with glass fibres, making it more resistant to heat and flames. Additional fire resistance is added by wrapping it in thick paper or fibreglass.
Plasterboard designed to withstand fire needs to be installed according to the manufacturer's specifications. To keep its fireproof qualities, you may need to use sealant, fireproof screws, sealant, or joint compound. Plasterboard treated with a fire retardant can help control the spread of a fire, but it is not a foolproof solution.
Therefore, it's crucial to get out of a burning building as soon as possible and follow all safety protocols.
4. Soundproof Plasterboard
The walls, ceilings, and floors can be made more soundproof by installing soundproof plasterboard, also called acoustic plasterboard. It is typically installed in rooms where soundproofing is particularly important, such as recording studios, movie theatres, meeting rooms, and private bedrooms.
Normal plasterboard is hollow and lightweight, but soundproof plasterboard has a gypsum core that is denser and heavier. When you encase something like this in an acoustic material like mineral wool or fibreglass, the sound waves are absorbed, and the amount of sound that can travel through them is reduced.
Plasterboard that blocks out noise can be found in various sizes and thicknesses. Although thicker plasterboard is better at blocking noise, it can be more challenging to install.
5. Thermal Plasterboard
To enhance the insulation properties of walls and ceilings, a specialised type of plasterboard known as thermal plasterboard or insulated plasterboard has been developed. This method is often employed whenever increasing a building's energy efficiency is a priority, whether during construction or renovation.
Thermal plasterboard comes in various sizes and thicknesses depending on your insulation needs. Generally speaking, thicker plasterboard provides better insulation but may be more challenging to install.
If you want to ensure your thermal plasterboard is installed properly, read and follow the manufacturer's instructions. Sealing joints and gaps and possibly having used special screws or fixings can help with this.
6. Impact-Resistant Plasterboard

Builders can use impact-resistant plasterboard to protect walls and ceilings from being shattered in an accident. Schools, hospitals, and arenas use it because of the increased impact risk in those places.
Plasterboard designed to withstand impacts has a reinforced core made from fibreglass or another reinforcing material. Plasterboard with a core like this is strong and long-lasting because it is sandwiched between two layers of traditional plasterboard.
Damage from things like a door slamming into a wall or a ball being thrown can be mitigated with the help of impact-resistant plasterboard. As a result, the time and resources required for maintenance and repairs may be cut down.
Plasterboard Surface Properties
Painting plasterboard correctly requires familiarity with its surface properties and characteristics. The following are a few things to keep in mind.
Adhesion
Without proper paint adhesion, plasterboard can peel, flake, or crack after being painted. Several factors, including improper surface preparation, low-quality paint, and sloppy application, could be to blame.
Smoothness
Plasterboard may, at first glance, appear to be smooth; however, even the smallest imperfections and textures can result in unevenness in the painted finish if the board needs to be installed or finished properly.
Porosity
Plasterboard is more likely to absorb paint than other materials like wood or metal due to its porous surface. Therefore, getting a smooth, even coating with the proper preparation methods is possible.
Absorbency
Due to its porous composition, plasterboard can swell and warp when exposed to fluids containing high concentrations of moisture, such as paint. This is especially a concern in moist environments like kitchens and bathrooms.
Key Steps And Best Practices For Preparing A Plasterboard Surface For Painting
Plasterboard painting is easy to give a room a new look, but only if the surface is properly prepared. Best practices and essential procedures for priming and painting plasterboard are outlined below.
Make The Surface Clean
First things first: give that plasterboard surface a good scrub down. Dust and debris can be easily removed by wiping the area down with a damp cloth or sponge and then waiting for it to dry before continuing.
Restore Any Damage
Before painting, fix any damaged areas on the plasterboard surface. Sand any rough spots smooth after filling them with spackling paste or a similar material.
Sand The Surface
If the plasterboard has any rough or uneven spots, sanding them down will help you get a nice, even coat of paint on them. However, be cautious not to over-sand or scratch the surface when you use fine-grit sandpaper (such as 220 grit) in a circular motion.
Apply A Primer
Priming the plasterboard is a necessary step before painting. If you do this first, the paint will stick better, and the finish will be more uniform. Choose a primer that will adhere to the plasterboard and work with the paint you intend to use.
Make Use Of High-Quality Paint
If you want your plasterboard painting job to last, use high-quality paint that can withstand frequent washings. Paints made for use on plasterboard should be sought out.
Use Thin Layers Of Paint
Instead of attempting to cover the surface with one heavy layer of paint, it is best to apply the paint to the plasterboard in several thin layers. In addition, drips can be avoided, and an even, smooth finish can be achieved in this way.
Allow Time For Drying
Finally, make sure to give the paint plenty of time to dry after each coat and after the last coat has been applied. Before touching or moving anything near the painted surface, wait for the recommended amount of time specified by the manufacturer.
Choosing The Best Plasterboard Paint: Types And Considerations
Using the correct paint on your plasterboard is crucial if you want a smooth, long-lasting finish that looks like a pro did it. Consider these factors when deciding on a paint colour:
Oil-Based Paint
Plasterboard can be painted with either oil- or water-based paint; however, oil-based paint takes more time to dry and may be harder to clean than water-based paint. On the other hand, oil-based paints, in contrast to latex paints, are extremely long-lasting and resistant to flaking and peeling.
Latex Paint
Plasterboard is frequently painted with water-resistant latex paint because of its quick drying time and simple cleanup requirements. In addition, it is resistant to the wear and tear normally experienced.
Acrylic Paint
When it comes to painting mediums, acrylic paint offers a variety of choices, such as the use of plasterboard. It dries rapidly and resists moisture, but other paints might last longer.
The Advantages And Disadvantages Of Painting Directly On Plasterboard
There are many benefits to painting on plasterboard.
Advantages
Cost-Effective
You can save a lot of money by simply painting your walls or ceilings with plasterboard instead of purchasing expensive materials or hiring professionals to do the job.
Installation Is Quick And Simple
Both do-it-yourselfers and professional contractors widely use plasterboard, Considering its low price and adaptability in installation.
Customization
Plasterboard can be easily altered to take on any colour, texture, or finish you desire, allowing you to generate any ambience you envision in the area you're working on.
Simple To Maintain
Plasterboard that has been painted requires little maintenance, making it an excellent material choice for locations with many people walking through them or being subject to moisture, dirt, and dust.
Disadvantages
Durability Is Limited.
Even though painted plasterboard isn't as sturdy as metal or wood, its finish can still chip, crack, and peel over time if subjected to extreme conditions.
Professional Assistance
If you want your plasterboard wall to look perfect, hire a professional painter or contractor. This is especially true with more complex applications requiring greater skill and accuracy.
Imperfections On The Surface
Plasterboard's joints, seams, and nail holes can be difficult to conceal or smooth out, even with multiple coats of paint.
Moisture Damage
In high-humidity or frequently wet environments, plasterboard can swell, warp, and even become a breeding ground for mould.
Painted Plasterboard Maintenance And Care
If you want your painted plasterboard to last as long as possible, regular maintenance is essential. Some advice that may prove helpful is provided below.
Prevent Moisture
Too much dampness is bad for plaster and paint. Plasterboard surfaces that have been painted should be stored away from rooms with high humidity, like bathrooms and kitchens. Dehumidifiers and fans can quickly remove moisture and stop any further destruction.
Retouching Frequently
Once some time has passed, the painted plasterboard could become damaged due to furniture or regular use. Be sure to give any worn-out areas a new coat of paint regularly so that it continues to appear brand new.
Clean Regularly
Plasterboard needs to be cleaned regularly to maintain its pristine appearance. If you want to clean this surface without risking paint damage from harsh chemicals or abrasive materials, all you need is a soft cloth or sponge and a mild detergent.
Repair The Damage
Take immediate action to prevent the paint from chipping off the plasterboard surface. A fresh coat of paint should be applied after the surface has been sanded down to remove scratches and dents.
Is It Necessary To Skim The Plasterboard Before Painting?
Both yes and no can be true.
Where the plasterboard goes and what kind of finish you want to achieve will determine this. While standard plasterboard should be avoided in wet areas like the kitchen and bathroom, it is an excellent option for inexperienced plasterers because it can be painted directly. However, plasterboard is often better off when it's completely skimmed.
Skimming a plasterboard wall creates a smooth, durable finish that can withstand the elements and accept a variety of finishes.
You can tile right over the newly plastered plasterboard in wet areas like a kitchen or bathroom. You can cover up the plaster with wallpaper or emulsion anywhere else in the house.
Conclusion
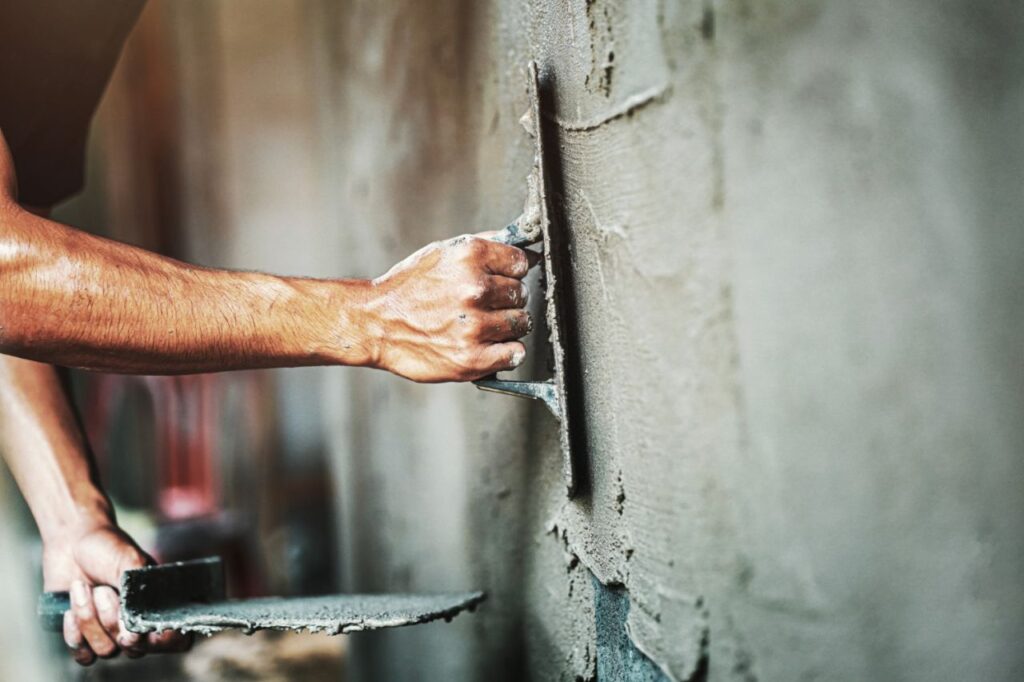
Plastering trowels are rectangular and flat and are used to spread and smooth building materials like plaster.
Different sizes and forms serve different purposes. Masons use pointing trowels to improve their skills, repair brick and stonework, and fill in tiny fractures.
They're lightweight, accurate, and simple to handle, making them great for finicky projects. However, they are not without drawbacks, such as restricted scope, rigid functionality, and lengthy implementation.
After the first coat of plaster has dried, finishing trowels are used to smooth and level the surface.
They can be either flexible or rigid and available in a wide range of sizes and shapes. Plaster, surface, and personal preference all play a role in deciding which trowel to employ.
Selecting the proper trowel is crucial to the success of any plastering job. If you want your plastered surfaces to seem polished and professional, you need a finishing trowel.
Their sleek appearance, adaptability, and user-friendliness are just a few of the many advantages they provide. However, they are not ideal for difficult surfaces, necessitate numerous passes, and could call for more expertise to get a professional finish.
Plastering in tight spaces, including around window frames, is a breeze with a window trowel because of its narrow blade and lightweight design. They work well for limited spaces, but producing a flawless surface takes practise and skill. However, they are not appropriate for difficult surfaces because they may not smooth out every single bump and divot.
Applying cement mortar to corners and mixing small amounts of material necessitate the use of a gauging trowel, which is required for precise plaster quantity estimation. They're portable, light, and great for mixing up modest quantities of plaster. Mixing them evenly and consistently, however, takes practise and skill.
Like regular trowels, but with a triangle blade, a corner trowel serves the same purpose in completing and rendering corners. They're quick, simple, and produce excellent results. Corner trowels can be useful, but only if you know how to use them, and not all corner shapes are suitable for them.
Finally, bucket trowels are helpful for making less of a mess when using a large amount of plaster straight from a bucket. Because of the angle of the handle and the generous shape, applying plaster doesn't require getting your hands messy.
Overall, the plastering process can benefit substantially from the use of finishing trowels and gauging trowels. When applying plaster from a bucket to a surface, a bucket trowel is a flexible and effective tool.
They work wonderfully for transferring plaster from the bucket to a hawk or trowel.
Cleaning a bucket trowel after use is as simple as rinsing it with water. But their weight makes them tiresome to carry for long periods.
Plastering trowels should be between 12 and 16 inches in length. A trowel that is 14 inches long offers a happy medium between precision and quantity while applying plaster. Your capacity to exert control, speed, and pressure will vary depending on the size of your trowels.
Plasterboard, often known as gypsum board, is a lightweight and inexpensive building material that consists of two layers of strong paper or fibreglass matting sandwiching gypsum plaster. Its low cost, fire resistance, ease of installation, and flexibility to work around barriers like wiring and pipes have made it a popular choice for usage on interior walls and ceilings. It comes in a range of sizes and thicknesses so you may find the perfect material for your unique needs.
Standard plasterboard, moisture-resistant plasterboard, fire-resistant plasterboard, soundproof plasterboard, and thermal plasterboard are only some of the more prevalent varieties. Most new building and remodelling projects use standard plasterboard for interior and exterior walls because of its low cost and ease of installation.
Plasterboard that is designed to survive fire is called fire-resistant plasterboard, fire-rated plasterboard, or Type X plasterboard.
Plasterboard with added acoustic insulation can reduce noise transmission through walls, ceilings, and floors. Recording studios, movie theatres, conference rooms, and even bedrooms are some of the common places you'll find it installed due to the importance of soundproofing in such settings.
Plasterboard, in sum, is an adaptable and inexpensive building material that may be painted or textured to provide a variety of looks. Plasterboard needs to be properly prepared for painting in accordance with manufacturer guidelines to provide a flawless and long-lasting finish. You may find thermal plasterboard in a range of widths and depths to suit your insulation requirements.
The insulating properties of thicker plasterboard, however, may make it more difficult to install. Following the manufacturer's instructions, sealing any cracks or gaps, and using the appropriate screws or fasteners will all contribute to a successful installation.
Schools, hospitals, and stadiums utilise impact-resistant plasterboard to prevent damage to walls and ceilings from falling objects. It is durable because of the reinforced core that is between the two layers of regular plasterboard.
Understanding the stickiness, smoothness, porosity, and absorbency of plasterboard is essential for painting it. Plasterboard can peel, flake, or fracture if not properly prepared, resulting in an uneven finish. A uniform, smooth finish is possible with the right approach to preparation.
These are the steps you need to take to get a plasterboard surface ready for painting:
First, make sure the area is spotless. A wet sponge or towel can do the trick for wiping away dust and dirt.
Second, use spackling paste or an equivalent compound to fix any holes you find. Smooth down the bumps so the paint goes on evenly.
Third, use a primer that will help the paint stick to the plasterboard.
Fourth, invest in paint that can resist repeated cleanings. To prevent drips and ensure an equal coating, apply the paint in thin layers.
5, make sure to let each coat dry well before applying the next.
Do not touch or move anything near the painted surface until the manufacturer-recommended drying period has passed. Consider options including oil, latex, and acrylic paint when deciding on the best paint for your plasterboard.
Latex paints are quick to clean but not as durable as oil-based paints, which can endure for years without flaking or peeling. Acrylic paint provides more variety, but oil paint may hold up better over time.
Plasterboard has many advantages, such as low cost, rapid and easy installation, adaptability, customisation, low maintenance, and longevity. Nonetheless, it may chip, crack, or peel over time and is not as durable as metal or wood.
If you want a perfect plasterboard wall, it's best to hire a professional painter or contractor. Plasterboard is an adaptable material that can tolerate a wide range of treatments and conditions. Preventing dampness, constantly retouching, cleaning, and fixing damage are all crucial to its longevity.
Avoid exposing surfaces to high humidity, clean with a soft cloth or sponge and light detergent, and use dehumidifiers and fans to dry them off. Skim coating the plasterboard before painting it can produce a smooth, durable finish suitable for tile or wallpaper in damp places.
Plasterboard may be skimmed to give a smooth, long-lasting finish that can be used on a variety of surfaces, making it a great choice for less-experienced plasterers.
Content Summary
- Painting directly on plasterboard allows for easy customization and injecting color into your walls and ceilings.
- Proper preparation ensures a smooth and long-lasting finish tailored to your preferences.
- Plasterboard, also known as drywall, is a versatile and affordable construction material.
- It consists of gypsum plaster sandwiched between layers of heavy paper or fiberglass.
- Plasterboard is widely used for interior walls and ceilings due to its low price, fire resistance, and adaptability.
- There are different types of plasterboard, including standard, moisture-resistant, fire-resistant, soundproof, thermal, and impact-resistant.
- Standard plasterboard is the most commonly used type and comes in various dimensions and thicknesses.
- Moisture-resistant plasterboard is designed for high humidity areas like kitchens and bathrooms to prevent mold and mildew growth.
- Fire-resistant plasterboard is used in areas requiring increased fire safety, such as walls, floors, and ceilings.
- Soundproof plasterboard is used in rooms where noise reduction is important, such as recording studios or bedrooms.
- Thermal plasterboard enhances insulation properties, improving energy efficiency in buildings.
- Impact-resistant plasterboard protects walls and ceilings from damage in high-impact areas like schools and hospitals.
- Painting plasterboard requires understanding its surface properties, including adhesion, smoothness, porosity, and absorbency.
- Proper surface preparation is essential for successful plasterboard painting.
- Steps for preparing a plasterboard surface include cleaning, repairing any damage, sanding, and applying a primer.
- High-quality paint should be used for a long-lasting finish that withstands frequent washings.
- Thin layers of paint should be applied to achieve an even and smooth finish.
- Sufficient drying time between coats is important for a professional-looking result.
- Different types of paint can be used on plasterboard, such as oil-based, latex, and acrylic.
- Oil-based paint is durable but takes longer to dry and clean up.
- Latex paint dries quickly and is resistant to wear and tear.
- Acrylic paint dries rapidly and resists moisture.
- Painting directly on plasterboard offers cost-effectiveness and easy installation.
- Plasterboard can be easily customized to any color, texture, or finish desired.
- Painted plasterboard requires little maintenance, making it suitable for high-traffic areas.
- Painted plasterboard may not be as durable as other materials and can chip, crack, or peel over time.
- Hiring a professional painter or contractor can ensure a perfect finish, especially for complex applications.
- Imperfections on the plasterboard surface, such as joints and nail holes, can be challenging to conceal.
- Plasterboard in high-humidity environments can be prone to moisture damage and mold growth.
- Regular maintenance is essential for painted plasterboard to prolong its lifespan.
- Preventing moisture and humidity is crucial to preserve the integrity of the plasterboard and paint.
- Regularly retouching worn-out areas keeps the painted plasterboard looking fresh.
- Gentle cleaning with a soft cloth or sponge and mild detergent maintains the pristine appearance of plasterboard.
- Immediate action should be taken to repair any damage to prevent paint chipping.
- Skimming plasterboard creates a smooth and durable finish that can accept various finishes.
- Standard plasterboard can be painted directly but is not suitable for wet areas.
- Completely skimming plasterboard is recommended for better results, especially in wet areas.
- Skimmed plasterboard allows for tiling in wet areas and covering with wallpaper or emulsion elsewhere in the house.
- Preparation is key to achieving a smooth, long-lasting finish on plasterboard.
Frequently Asked Questions About Plasterboard
When it comes to painting plasterboard, the best paint type is typically water-based or latex paint. These paints are easy to apply, dry quickly, and provide good coverage. They are also low in volatile organic compounds, which means they have less odour and are safer to use indoors. Additionally, water-based paints are durable and can withstand regular cleaning. It's important to prime the plasterboard before painting to ensure better adhesion and a smoother finish.
Yes, you can use a roller to paint the plasterboard. Using a roller is one of the most common and efficient methods for painting large, smooth surfaces like plasterboard. A roller allows for even application of paint and helps cover a large area quickly.
Choosing the right roller cover with a nap length suitable for the texture of your plasterboard is important. For smoother surfaces, a shorter nap length (around 1/4 inch) is recommended, while textured surfaces may require a longer nap length (around 3/8 to 1/2 inch). Rollers make painting easier and provide a smooth and uniform finish on your plasterboard.
In most cases, it is optional to sand the plasterboard before painting. Plasterboard typically has a smooth surface ready for paint application without sanding. However, if imperfections, such as bumps, ridges, or rough patches on the plasterboard, sand those areas to create a smoother surface lightly.
Sanding ensures a more even and professional-looking finish. It's important to use fine-grit sandpaper and be gentle while sanding to avoid damaging the plasterboard. After sanding, wiping away any dust with a clean cloth before proceeding with priming and painting is recommended.
Yes, you can use spray paint on the plasterboard. Spray painting can be a convenient and efficient method for applying paint to large areas, including plasterboard surfaces. However, it's important to use spray paint specifically designed for interior surfaces and follow the manufacturer's instructions. Before spray painting, it's advisable to protect surrounding areas with drop cloths or masking tape to prevent overspray.
Additionally, ensure the plasterboard is clean and free of dust or debris before applying the spray paint. Proper ventilation is also essential when using spray paint indoors. By following these guidelines, you can achieve a smooth and even finish on your plasterboard using spray paint.
The drying time for plasterboard before painting can vary depending on several factors, such as temperature, humidity, and thickness of the plasterboard. Generally, it is recommended to allow at least 24 to 48 hours for the plasterboard to dry completely before applying paint. Thicker plasterboard or areas with high humidity may require additional drying time.
It's important to ensure that the plasterboard is completely dry to avoid trapping moisture, which can lead to paint peeling or blistering. If you need more clarification about the drying time, it's best to refer to the manufacturer's recommendations or consult a professional before painting.


